• Skip to primary navigation
  • Skip to main content
  • Skip to primary sidebar
  • Skip to footer

Get Cooking!

Recipes, Kitchen Gadgets, Cookbook Reviews, Gluten Free Recipes...

  • Home
    • Contact
    • About
    • Privacy Policy
    • Sitemap
    • Store
  • Reviews
    • Cookware Reviews
    • Food Reviews
      • Gluten Free Food Reviews
      • Health Food Reviews
    • Bakeware
    • Candy Reviews
    • Coffee Reviews
      • Aerobie AeroPress Coffee and Espresso Maker
      • Coffee Makers & Grinders
    • Cookbook Reviews
      • Cooking Magazines
    • Kitchen Gadgets
    • Small Kitchen Appliances
  • Gifts & Collectibles
    • Candy Bowls
    • Christmas Shopping
    • Coffee Mugs
    • Canister Sets
    • Cookie Cutters
    • Gifts for Coffee Lovers
    • Gifts for Tea Lovers
    • Owls in the Kitchen
    • Pig Collectors
  • Recipe Index
  • How to Be a Better Cook
    • Baked Sweet Potatoes in the Oven
    • Cooking Videos
    • PERFECT Baked Potatoes in Your Oven
You are here: Home / Archives for Cooking Tips

Cooking Tips

How to Use Peppercorns to Add Flavor to Your Recipes and Food

May 4, 2022 By Joi Sigers

Black Peppercorns

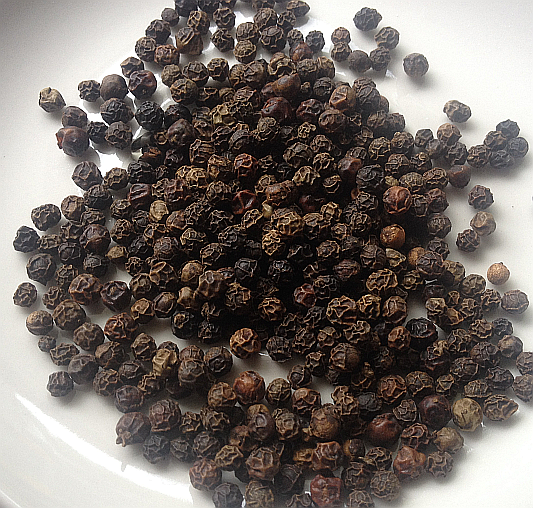
Black Peppercorns.. So Much Flavor!

I’ve always been one of Black Pepper’s biggest fans. This glorious spice, often taken for granted, can take the ordinary into the spectacular. If you don’t believe me, just ask mashed potatoes.

I guess that’s why I talk about pepper so much – to make sure it isn’t overlooked or slighted in the least. There’ll be no taking pepper for granted on my watch!

When I first fell madly in love with cooking, the little red and white tin of pre-ground pepper was my mainstay. In fact, we had a thing going for years. I’d buy big tins of ground pepper and fill my salt and pepper shakers for daily use and whip out my red and white tin for cooking.

Then, one fateful day, my culinary world opened up. While in the grocery store, browsing a favorite aisle (the spice aisle – where I could spend hours),  I saw peppercorns and peppercorn grinders. I noticed that, like people, peppercorns came in a beautiful array of colors – black, pink, white, and even green.

Mind, blown.

I rounded up every peppercorn and grinder in sight and headed home to play with my new toys.  It’s a process I’ve repeated hundreds of times since.

Using different peppercorns for different dishes really adds exciting and fun layers of flavor.

A quick rundown of the different peppercorn flavors:

Green peppercorns have a sharp, fresh flavor. Some of the best dishes to use green peppercorns with are vegetable dishes and salad dressings. A good way to remember this is to think of the green… green peppercorns = eating green = vegetables.

Pink peppercorns may have the most distinctive and unique flavor of all the peppercorns. These little beauties have a delicate, fragrant flavor that’s somehow both sweet and spicy at the same time. I love the color pink peppercorns bring, literally, to the table. While they go with everything imaginable, most people prefer them with sweet foods and fruit.  They’re all kinds of delicious on cantaloupe and watermelon.

White peppercorns are mostly used when a cook doesn’t want any black specks whatsoever in their dish. Me? I live for the black specks, but I can see wanting a special cheese sauce or cream to be solid and universal in color. White peppercorns give a taste that’s very similar to black peppercorns.

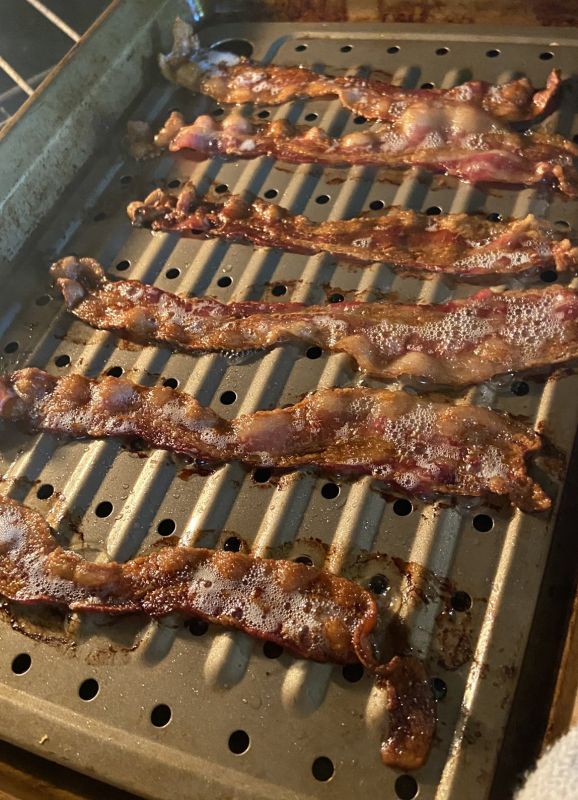
And last, but in NO way least, the star of the peppercorns world, Black Peppercorns. Black peppercorns can be used with absolutely anything you dream up in your kitchen. Eggs, potatoes, meats, vegetables, fish, etc.

Black pepper begins to lose some of its flavor as soon as it’s ground, which is why using peppercorns with your own grinder is preferable for cooking and eating.

Tellicherry Peppercorns are rock stars in the peppercorn world. These black peppercorns are left on the vine longer and allowed to over-ripen. They are bigger in both size and flavor.

I first sought out Tellicherry Black Peppercorns when I read that they were one of Colonel Sanders’ secret ingredients in his fried chicken. I figured that if they were the Colonel’s “go to” peppercorn, I  had to try them out. I’ve bought them religiously since.

In addition to a grinder filled with only black peppercorns, I always have a grinder filled with a combination of all colors of peppercorns. This colorful blend is excellent for stews, soups, eggs, and countless other kitchen regulars.

Rachael Ray Fancy Boy Peppercorn Grinders

Rachael Ray’s Fancy Boy Grinders (Amazon link) are something I would be lost without. I’ve written at least one Fancy Boy Grinders Review on Get Cooking.

Unfortunately, they can be tough to find in stores (although her Pink Himalayan Salt Fancy Boy Grinder is pretty easy to find). Fancy Boy Grinders can be found on Amazon easily enough (just click the link to check them out).

Rachael Ray’s Fancy Boy Peppercorn Grinders:

  • Rockin’ Rainbow Peppercorn Blend
  • Malabar Black Peppercorns

Shopping for Peppercorns

Your grocery store may or may not have peppercorns available in all of the available peppercorn colors. If they come up short, always keep Amazon in mind. Peppercorns on Amazon are available in bulk, meaning you won’t run out any time soon and you can find unlimited colors and blend combinations, including the Rainbow Peppercorn Blend (both links are Amazon links).

Peppercorn Grinders

When it comes to peppercorn grinders, my three favorite places to shop are Amazon (See Amazon Peppercorn Grinders), TJ Maxx, and Target. Kitchen supply stores are also a great place to check – but they can be pretty pricey.

Wherever you find your peppercorns and peppercorn grinders, just be sure to mix things up and experiment with different varieties of peppercorns.

You’ll be amazed at all the different flavors they bring to the table!


Filed Under: Cooking Tips, Spices Tagged With: pepper grinders, peppercorns, spices

Why I Always Have Gourmet Garden Lightly Dried Herbs on Hand (and a Few Favorite Ways to Use Them)

October 22, 2021 By Joi Sigers

Fried Eggs with Vegetables and Ground Beef - topped with parsley.

Fried Eggs, Sautéed Vegetables, Ground Beef, and Parsley 

While I LOVE growing my own herbs for use in cooking, sometimes I’ve harvested one to the nub or simply don’t have enough of the one I need on hand to use. That’s when these lightly dried Gourmet Garden herbs come to the rescue. Just a note, this isn’t a paid for post or anything remotely like that – it’s just me raving about something I love and know you will too.

I have, in the past, bought those nice, cheap dried herbs in the supermarket – you know, the ones in the plastic containers that hang above produce? I honestly have never been completely happy with these herbs. I have no idea what happens to the herbs in the process of getting into our supermarkets, but they sure do lose their flavor along the way.

That’s why, last winter, when I wanted some basil for my favorite Italian vegetable beef soup, I grabbed a Gourmet Garden tub of basil. It cost a bit more but, by gosh, my soups are worth it! As soon as I took off the lid, I knew I had made the best decision. Besides, the initial extra pennies spent actually pay for themselves because these lightly dried herbs are so flavorful (tasting like they just came from your herb bed), you actually use less of them than they’re counterparts with the dry personalities.

Gourmet Garden Parsley

Gourmet Garden Lightly Dried Parsley

I have used every single herb available in this line and do so regularly. Heck, I buy the parsley and basil ones every time I’m in the store – I use them that often.

Basil: The basil one is delicious in soups, pasta salads, and sauces. I also use it very often as an appetizer – I slice fresh mozzarella, fresh tomatoes, and roll up slices of prosciutto, salami, and/or pepperoni. I drizzle everything with Rachael Ray Balsamic Vinegar Reduction (Amazon link… also found in most grocery stores – it’s the absolute best on the market).  Then I top it all off with a sprinkling of the Gourmet Garden chopped basil. Delicious!

Parsley: I use this one on and with just about everything – especially potatoes and eggs. You don’t realize just how much parsley brings to the party until you send it an invitation. It’s healthy, adds a bright wonderful flavor to just about everything, and… come on, let’s be honest… looks marvelously high brow!

A quick and easy meal (one of those that you almost always have the ingredients for and comes together super fast) is pictured here – simply make your ground beef patties (seasoned with salt, pepper, and garlic powder). When they’re through, set aside and keep warm. Sauté asparagus, bell pepper, and onion in the juices from the beef…. season with salt and set aside with the meat. Add your eggs and cook them either sunny side up or over easy. Unless your meat was particularly fatty (and do they even make them anymore!?), you’ll need to add a little butter, olive oil, or bacon grease to the pan before the eggs.

Who doesn’t love a quick, easy, flavorful meal?!

Fried Eggs with Vegetables and Ground Beef - topped with parsley.

Fried Eggs, Sautéed Vegetables, Ground Beef, and Parsley 

Filed Under: Cooking Tips, Food Reviews, Herbs in Recipes, Quick and Easy Recipes Tagged With: basil, cooking tips, cooking with herbs, parsley

The Absolute BEST Homemade Whipped Cream

September 24, 2021 By Joi Sigers

Whipped Cream

Homemade Whipped Cream

I’ve made many different versions of homemade whipped cream (or whipped topping, if you prefer) and was decidedly loyal to another version for years (one that called for granulated sugar). After making it with powdered sugar, however, I have NEVER gone back to the other version and I never will. This one is simply much, much better.

I make up a batch each week to use in coffee, on cake, on ice cream, between cookies… you get the idea. We also love it on pancakes and waffles!

Due to its popularity in our home, I make up a larger amount than you may want – in which case, you’ll need to half this recipe.

One more thing, while a KitchenAid Stand Mixer isn’t necessary for this whipped cream, the consistency will be better if one is used!

  • Beat 2 cups of heavy whipping cream until it begins to thicken. Be sure it’s Heavy Whipping Cream and not just Whipping Cream (makes a big difference).
  • Add 4 Tablespoons powdered sugar and beat to incorporate.
  • Beat in 2 teaspoons of clear vanilla extract until stiff peaks form

About the clear vanilla: Obviously any vanilla extract can be used, but if you use clear the whipped cream will be even prettier.

Filed Under: Christmas Baking, Cooking Tips, Desserts Tagged With: Best Homemade Whipped Cream

Chicken Salad with Eggs: You’ll Be Surprised How Much Flavor the Eggs Add!

September 11, 2021 By Joi Sigers

Chicken Salad with Boiled Egg Recipe (Gluten-Free)

Chicken Salad with Boiled Egg Recipe (Gluten-Free)

When I  had to start eating entirely gluten-free (health reasons), I realized how much I took sandwiches for granted – especially favorites like chicken salad, pimento cheese, and egg salad. Throw them on bread and BOOM, you’re done. When you have (or choose to) eat gluten-free or choose to eat keto, you have to get creative. Thankfully this is pretty darn easy and actually just as delicious, if not more so.

If you’ll be eating this chicken salad recipe on bread (regular or gluten-free), you’ll probably want to chop the veggies finely and chop the chicken and eggs as much as possible. If, like me, you’ll eat it on the plate with lettuce, tomato, and all the pickles in the house (What? Not everyone is a pickle hound like me??), leave the chicken, boiled eggs, and veggies chunky (as in the picture above)- you’ll be glad you did when stabbing them with a fork.

After you’ve combined the ingredients, taste and add any extra mayo or seasonings desired.

Either way, I think you’re going to love this chicken salad recipe.

If you want an easier way to make “boiled” eggs, please do yourself a HUGE favor and check out the Dash Egg Cooker. I’ve used mine (at least once a week) for over a year and think, “This is one of the best kitchen gadgets ever made..” each time I use it. The eggs turn out PERFECT each time and are gloriously easy to peel.

If you’re looking for a great egg salad recipe, here’s one I use every single time!

Filed Under: Chicken Recipes, Cooking Tips, Egg Recipes, Gluten Free, Salad Recipes Tagged With: chicken salad recipe, gluten-free chicken salad, gluten-free recipes

The BEST Bacon is Made in the Oven-Baked Bacon (Here’s How)

April 26, 2021 By Joi Sigers

Oven Baked Bacon at 400 degrees

Oven-Baked Bacon

It’s already been established on the food blog that I’m a huge Rachael Ray fan. If she makes it, I buy it and use it. If she tapes it, I watch it and watch it. When I saw her bake bacon in the oven on an episode, I immediately bought her baking sheet (with a rack) and couldn’t wait to test the results.

The Rachael Ray Bacon Baking Sheet with Rack QUICKLY became one of my favorite things in the kitchen. How much did I love it? Well, I ordered a second one immediately.

I’ve used it most often for baking bacon but it is also ideal for roasting vegetables and, of course, the baking sheet itself can be used for anything, simply remove the rack.

The Best Oven-Baked Bacon

The basics (please read below for the whys and hows): Place your bacon onto the pan. Place into a cold oven and THEN turn on the heat to 400 degrees. Cook for 20 minutes.

Bacon in the oven simply tastes better and I have to admit, I was surprised just how much better. I also love that it doesn’t curl up – especially useful for breakfast wraps, crispy homemade bacon bits for salads, and BLTs.

(Continued below the goodness….)

Oven Baked Bacon at 400 degrees for 20 minutes

Oven-Baked Bacon at 400 degrees for 20 Minutes

While I, of course, use my baking sheet with rack for cooking bacon in the oven, it isn’t a necessity. You can put your bacon directly on a foil-lined baking sheet and you’ll do just fine. I have experimented for months with oven-baked bacon (I love my life) and these are my tips of the trade:

  • Buy good bacon. The whole bacon is bacon premise is incorrect and when you try different brands you’ll see what I mean. Smithfield and Oscar Meyer are the two I buy the most frequently.
  • Don’t pre-heat the oven. I mean, you CAN, but putting the bacon into a cold oven, then turning on the heat, seems to cause the bacon to render its fat more slowly (which is a delicious thing) and more evenly, as in less instances of a slice of bacon that’s half crispy and half fatty.
  • Baking Times Vary. Not only do oven temperatures and personalities vary, people’s individual preferences vary too. My husband likes for his bacon to be crisp whereas I like for mine to bend if you hold him out like a diving board. Use 400 degrees and 20 minutes as a “guide,” not as an “absolute.” Use this approach, but check the bacon at the 15 minute mark – unless you like yours to bend even more than I do, it will not be ready to eat at this point, but you’ll get an idea of how much further you want to go.
  • Keep Time. When you discover your favorite time frame for baking the bacon just as you like, write it down and put it someplace you’ll ALWAYS know where it is. On the refrigerator, in a frequently-used recipe box, or tattooed on your arm – this is vital information, treat it as such!

Not even remotely and ad and I have not been paid to say anything (if only I were paid to talk, I’d talk all the way to the bank!), but I highly recommend this Oscar Mayer Naturally Hardwood Smoked bacon, pictured below. Extraordinary and worth the extra pennies.

Oscar Meyer Baon

I just realized I don’t have a category for bacon on the food blog. What kind of madness is this?! I’m about to take care of that irresponsible oversight…

Done.


Filed Under: Bacon, Breakfast and Brunch, Cooking Tips, Food Reviews, Rachael Ray Tagged With: bacon in the oven, best bacon, oven-baked bacon

An INGENIOUS Way to Prepare and Eat Chicken: Where Has this Method Been all My Life?!

January 3, 2021 By Joi Sigers

Chopped Chicken Buffalo Burgers

Chopped Chicken Burgers, Topped with White Cheddar Cheese

I’ve become somewhat obsessed (make that pretty darn obsessed) with something lately that began as an experiment and ended with a full-on feeling of, “Why haven’t I been doing this forever?!”

Quick little backstory: I have a hiatal hernia which, while not a huge deal, can be annoying when it comes to certain foods – dense meats and bread in particular. Imagine trying to get a meatball through a coffee stirring straw… that’s how these foods can feel when you have a hiatal hernia that happens to be acting up at the time.

I had given chicken up entirely for quite a few months when I saw a cooking video on YouTube from one of my favorites, Sam the Cooking Guy (I’ll post this particular video below because I very much want you to see it). In the video, Sam took chicken and, using only his knife, cut it up exceptionally small, then formed patties with it in his hands and cooked it pretty much as you would a hamburger.

The first thing to hit my mind was that this process should make the chicken less “dense” and, since it’s the density that gives me problems, it may actually allow me to add chicken (which I love) back into my world.

I was so intrigued that I LITERALLY drove to the store and bought some chicken to try that very night. I was kind of holding my breath about a few things:

  • I found it hard to believe that it would stay together for me and actually make a chicken burger (it DID!).
  • I was afraid that my hernia would act up, even though the process made the chicken “feel” less dense (it DID NOT!)

I’ve used this process now about 7-8 times and come to love it even more each time. I normally make the patties and fry them in a little combination of butter and olive oil (my “go to” for cooking almost everything in the skillet), however today I used a combination of butter and avocado oil and they were amazing.

(Continued Below…)

Chopped Chicken

Seasoned Chopped Chicken, Ready to Party!

I’ve cooked chicken this way for…

  1. Chicken Parmesan – I add rosemary, basil, and thyme to the chicken and top it with marinara sauce and cheese. Delicious.
  2. Buffalo Chicken Burgers (Pictured Above) – Cooked as I normally do but topped the patties with buffalo sauce and blue cheese, and served, of course, with lots of celery.
  3. Regular Chicken burgers – cooked as it is in the video below. It makes outstanding chicken burgers.
  4. (Possibly my favorite way): I add chopped green bell pepper and chopped green onion to the chicken mixture and fry as I normally do. THEN, I top with white (gluten-free in my case) gravy and serve with mashed potatoes. I can’t tell you how delicious this is!

Naturally, if you don’t have to eat gluten-free, like me, feel free to put your chicken burgers on buns. I imagine that would be crazy delicious!

(Continued Below….)

Chicken Thinly Sliced

Buying Thinly Sliced Chicken will Cut Your Chopping Time in Half

A Few Tips:

  • If you’re able to buy thinly sliced chicken, doing so will cut your chopping time in half.
  • Most of the time, I chop in green bell pepper and onion (the combination is crazy good with these chopped chicken burgers) but they’re outrageously delicious without extras too.
  • When you’ve formed the balls, use a large spoon to “gently pat” them down, forming burgers (picture below).
  • When chopping my chicken, I season him on the chopping board- my reasoning is that, as I cut through him, the seasonings reach every nook and cranny.
  • Paprika is one of my favorite seasonings to use for chicken burgers – along with salt, pepper, and garlic powder, they turn out delicious each and every time.

Chicken Burgers

Use a Spoon to Flatten the Burgers Gently Into Place

While I use a plain old chopping board and sharp knife for making these chicken burgers, I’ve been researching meat grinders and found one on Amazon for under $40 (pictured below).

While I don’t at all mind using my knife and cutting board on the weekend, suppertime on weekdays need to be prepped and on the table fast. Last time I was cutting (and cutting and cutting!) the chicken, I reminded myself to check for meat grinders.  Because of the nature of raw chicken, I want one that’ll only be used for raw chicken. I think my food processor would probably do the trick, but frankly, I like keeping anything and everything I use for raw chicken separate from everything else.

Yes, I know it’s a ridiculous way to be – but it’s a mental wrinkle I can’t quite iron out.

So, I researched  meat grinders, price-checked, and all that jazz and have found the one I love (pictured on the right).

This is the Homeasy Meat Grinder (Amazon link) and should make food prep my weeknight chicken suppers quicker. This food grinder is equipped with 4 stainless steel blades and 2 modes to choose from.

You can chop or grind a variety of foods such as onions, meat, ham, garlic, onion, small herbs…

It’s equipped with a stainless steel bowl. The joint connection between blade and the main body is made of stainless steel unlike other plastic one thus the blade is not easy to break off.

While this is the one I have decided to go with, there are, of course, many different meat grinders on Amazon – different sizes, different prices, some manual/some electric. You can find exactly the one you’re looking for.

I look forward to giving this grinder a forever home in my kitchen – I promise it a steady diet of chicken.

Here’s the Sam the Cooking Guy Video:


Filed Under: Chicken Recipes, Cooking Tips, Daily Gift Ideas for Foodies, Gift Ideas for Cooks Tagged With: chicken recipes, Cooking Videos, meat grinder

Quick and Easy Meal Ideas: “Nights Off” at Home with Less Stress and Less Mess

November 8, 2020 By Joi Sigers

Freezer Meals for Nights Off

I love cooking. I mean… LOVE LOVE cooking. Everything about it. In fact, most of the time I don’t even mind the time and effort it takes to clean everything up. I figure it’s a great opportunity to use up a few of the calories I just consumed.

Yesterday, my husband and I were out of town most of the day and went to a local restaurant for supper (more about restaurants in a minute) when we got back in town. Last night, it hit me… I missed my kitchen time.

Having said all of that, however, I find that some nights (usually once… sometimes twice a week), I just want everything to be as simple and easy as possible. I don’t want to be in the kitchen for 30 minutes to an hour making the meal, followed by another 30 cleaning it up. I want food on the table fast and dishes that can either be tossed or washed in record time. Basically, my comfortable chair in the den is calling me and I want as few obstacles as possible before I answer the call.

I call these my “nights off” because instead of the normal, full-fledge, photo-worthy meals I make, I either pull something out of the freezer I had made and frozen previously or I pull out something ready to roll, pretty much as is.

Everyone needs nights or days off, right? Can anyone who works 5 days a week imagine not having a day off?! No way. Having days or nights off keeps you sane, keeps you rested, and most definitely keeps you from burning out.

Reasons for Eating Home More and Eating Out Less

I have nothing against eating out on occasion. I mean, let’s face it, it can be fun. Letting someone else do all the work while you sit and let them bring it to you… sweet luxury!

However, eating at home is almost always healthier – especially if you have food allergies, are on a special diet, or have any of the many diseases that can be greatly effected by the wrong food. Even trace amounts of the enemy foods build up and can be very bad for you.

Add to this the fact that we are in a pandemic AND coming up on cold and flu season (not to mention all the bugs that show up as soon as the weather cools) – even the biggest fan of dining out has to admit – you are safer at home.

I honestly hate to say  it, but my experience lately is that many restaurants are kind of “going down.” I don’t know if they’re having trouble getting or keeping good help or if cooking is a dying art but, just in the last year, four of my five favorite restaurants (two locally-owned and two chain restaurants) have gotten so bad I don’t care if I ever go back. The one of the five that’s still as good as ever is a local authentic Mexican restaurant.

Stay strong, guys, stay strong!

Another reason to keep your pantry, refrigerator, and even freezer stocked is that (as this global pandemic has taught us) you just never know what lies ahead. It’s always better to be able to take care of yourself and your family without having to count on others. You never know when their doors will close.

(Continued Below…)


Tips for Nights Off Meals (As Many Times a Week as You Want Them!)

Frozen Meals

You may be like me and actually love to cook, but simply are human and want a night off every now and then. Or, you may be like one of my daughters who had (literally, y’all) rather go to the dentist than cook! Whichever group you fall into, the following tips and ideas will, hopefully, help you as much as they do me.

  • When you make soup, chili, or casseroles, make a little extra to freeze for a future meal. I have perfected this routine to where I always have at least two soups and one chili in the freezer and ready to go at a moment’s notice. Amazon has countless sizes and shapes of freezing containers (link to Amazon) – you’ll want to find a set with different sizes. This has been such a wonderful system for me. Soups and chili, in particular, taste like they were made that day.
  • Don’t think the freezer has to have just food you’ve made! As you can see from the sample pictures here, I’m a huge fan of Amy’s frozen meals, as well as her burritos. While I keep them on hand, primarily, for my lunches while my husband is at work, I have often fixed them for both of us on one of my luxurious “nights off.” The burritos are excellent with rice, a salad, eggs, or (simpler, still) tortilla chips and salsa. The frozen meals are even easier because the only dishes you mess up are your forks and glasses! Frozen pizzas, corndogs, fries (top with a can of heated canned chili and cheese and call it a meal)… the choices are limitless. Just be sure to always have your “night off” section of your freezer locked and loaded.
  • My favorite night off meal is actually one of my husband’s favorite meals – bacon, eggs, and a few vegetables cooked in the same pan (broccoli, zucchini, cauliflower, mushrooms, onions, bell peppers… whatever combo you like). The one pan strategy helps with clean up considerably and, let’s face it, it doesn’t get any simpler than bacon and eggs.
  •  Oatmeal or grits is another filling, warm, comforting, and delicious meal. I could eat either of these all by themselves, but my husband loves a couple of fried eggs with his.
  • Never, ever underestimate soup and sandwiches – they’re filling, healthy, and most definitely perfect for your night off.
  • When possible, keep salad makings on hand and your favorite salad dressing ready to pour. Simply adding chicken, beef, boiled eggs, or bacon to a great salad makes a healthy meal.
  • Have you seen those little packets of instant potatoes? They cook in less time than it takes to brush your teeth and, frankly, taste darn good. They come in lots of flavors and varieties and are outstanding. Keep plenty of these on hands for accompanying deli chicken or soup or chili from the freezer. Soup and chili, both are great served over these guys.

Some people think certain foods are only “acceptable” for breakfast or lunch and wouldn’t consider them for supper. Well, that’s just nuts.  Breakfast suppers are downright addictive and traditional “lunch” suppers are right there with them.

I have seen some people schedule these types of nights and call them things like “cheat nights” or “lazy nights” – and scheduling them is certainly an option. For me, personally, however – I never know quite when the “My chair is calling me and I don’t want to be on my feet another minute!” mood is going to hit until it does… so, I simply have my options on stand by.

One final word about restaurants…

I actually put this post together because of something that I experienced last night at what was once a favorite chain restaurant. I ordered the grilled catfish as I normally do (along with greens and pinto beans). I took a bite of the catfish from the end… all seemed normal… ate some of the greens and beans… then picked up my fork and knife and tried to cut into the catfish. It would not cut… it was completely undercooked… as in raw. I literally could not cut through it.

Undercooked meats can host a whole world of trouble for a person – salmonella, food poisoning… and if you’ve ever been on the receiving end of either of these, you know how horribly sick they make you. I am very, very lucky that I only took a small bite of this fish that was all but flopping around on my plate.

Now I know for certain that, in the future, whenever I order meat, I will never again assume that restaurant cooks use food thermometers as I do in my own kitchen. I’ll also cut into the middle of the meat before even thinking about taking a bite.

As I said before, I don’t know why it is but a lot of restaurants are, collectively, getting worse. You just can’t be too careful – certainly not when it comes to your health.

Stay safe and stay well!

~ Joi (“Joy”)

Amy's Burritos

Filed Under: Cooking Tips, Gluten Free Food Reviews, Quick and Easy Recipes Tagged With: cooking tips, easy meal ideas, easy meals

Chili Tips of the Trade and a Kitchen Tool You Absolutely MUST Have

October 18, 2020 By Joi Sigers

Chili with Fixings

Chili with the Fixin’s!

It’s that time of year again… Chili season!… and personally I couldn’t be happier. I love cool weather, crock-pot meals, homemade soup, and chili.

The more chili, the better.

The only problem one can run into, though, when you frequently make, serve, and eat chili is (if you aren’t careful) it’s easy to fall into a rut. I guess that’s true with any meal you make frequently, but in my experience, chili is the trickiest rut trap.

Below are some ideas I’ve accumulated over the years of being a raging chili fanatic. They’ll keep thing lively, tasty, and colorful while keeping you (and your chili bowl) out of a dreaded rut.

Meat Chopper Tool

Meat Chopper Tool Getting the Meat Chili-Ready

Chili Tips and Ideas

  1.  If you have chili as often as I do (especially during chili season), consider mixing up your recipe and/or ingredients fairly regularly – even if it’s ingredients you’ve ALWAYS used, try replacing it with something new OR simply add a new ingredient. Celery, bell peppers, onions, jalapenos, red pepper flakes, finely shredded carrot… mix and match. Basically, have fun and get creative.
  2. Change up your seasoning mix or spices. My personal favorite chili seasoning mix (and the one I use probably 75 percent of the time) is Carroll Shelby’s (link to the mix on Amazon, but they’re in most all stores) but ever so often, I’ll simply use a combination of my own spices or I’ll use a gluten-free packet of seasoning I find in the store. Each gives its own unique flavor to your chili.
  3. When browning your ground beef (I prefer using ground angus or chuck but will basically use whatever I have on hand), use an inexpensive meat chopper (link to the one I use on Amazon). The one pictured above the Chili Tips is the one I use for soups and chilis and wouldn’t take anything for it! What makes this tool so perfect for chili (and soup for that matter)? My cooking philosophy has always been, “The more flavor combinations that fit on a spoon or fork, the better.” The smaller the meat…. and the smaller the vegetables… the more flavors will fit on your spoon. Simple as that.
  4. Don’t use water… use beef broth! Another one of my cooking philosophies is, “Water dilutes flavor… broths add flavor.” I use chicken broth (chicken chili, rice, boiling vegetables..) and beef broth almost daily, so we pretty much keep them stockpiled in the pantry. When making your chili, beef broth (or veggie broth when making vegetarian chili) is much better to use than plain old, flavor-diluting water.
  5. Have you ever set up a “taco bar” – complete with little dishes of tomatoes, cheese, onions, etc? Setting up a “Chili Bar” is every bit as fun and helpful. This way, everyone gets to add whatever floats their particular chili boat. Some ideas I love are: Fritos, freshly shredded cheddar (freshly shredded looks better than store bought, which looks like toy food), onions, green onion, scallions, sautéed onion, jalapenos, pickled jalapenos, rice, pasta noodles, diced chiles, red pepper flakes, sour cream, cornbread croutons (more about them in a minute)…. the options are almost endless. Corn dogs are also a fun, often unexpected item to include on a chili bar.
  6. Speaking of sour cream – I love it on chili all the time, but especially if it’s a little too spicy for my overly sensitive taste buds. Sour cream cools it down. A lot of people swear by adding a little peanut butter to their chili but, frankly…. well, I’d rather swear at it than by it!
  7. Using leftover chili for chili dogs is one of our favorite things to do. While warming the leftover chili, I use the meat chopper (link to the one I use on Amazon) mentioned above to give it more of a chili dog topping look. Sounds nuts, but, trust me, it’s darn good. Just be sure not to overdo it – you don’t want it looking like cat food pate.
  8. Using leftover chili is also perfect for chili burgers – simply top your burger with the chili (using the same technique for the chili dogs).
  9. Chili freezes very well – just warm it up with a little beef broth and it tastes freshly made.
  10. Cornbread croutons: Making cornbread, then cutting it into small squares is excellent on chili (especially if you add jalapenos to the cornbread). I also like to make fried cornbread (in the shapes of pancakes) and simply put them into the bottom of the bowl before adding the chili. Of course, you could always simply use regular cornbread to dip into your chili. The combination of chili and cornbread is outstanding – which is another reason corndogs are a perfect dinner guest for chili night.


Filed Under: Cooking Tips, Gift Ideas for Cooks Tagged With: chili recipes, chili tips, cooking tips

How a Captain Named Rodney Can Make Your Chicken Extraordinary….

March 18, 2020 By Joi Sigers

One of the things I often preach on the food blog (as well as in person, of course, but most of you will miss that rousing “in person” performance) is this:

If you want to be an extra special cook (and who would want to settle for okay when they can be extra special??), you need to get creative and step out of the ordinary. This means trying new kitchen tools and gadgets, cooking your favorite foods in new, exciting ways, and trying new sauces, seasonings, and ingredients. Not only is it a creative way to approach cooking… it’s a delicious way to approach life.

While there’ll be times you try something that makes you whisper to your cat, “That never happened,” other times you find something that’ll become a kitchen staple – something you’d no sooner allow yourself to run out of than you would salt and pepper. Captain Rodney’s Original Boucan Glaze (Amazon link) has been such a staple in our kitchen for many years.

It is OUTSTANDING. Sorry for yelling, but it is that extraordinary. Captain Rodney’s makes several seasonings, sauces, and glazes (click here to see their entire collection on Amazon).

The “set” pictured on the left is one I have my eye on – you get two bottles (which last quite a while, as only a little bit is necessary for the “rock your world” flavor) and a silicone basting brush. I’m a sucker for a basting brush.

How I Use Captain Rodney’s Original Boucan Glaze (sorry to keep using the full name, but I want to differentiate because there are several):

  1. This glaze is delicious when you add a little to cooked, hot rice. It takes it to the next level.
  2. I love to pour a little on top of a block of cream cheese and serve with crackers. Buttery Ritz or Ritz-type crackers are the best for this.
  3. Hamburgers – A little Captain Rodney’s on a burger with sauteed onions is out of this world good.
  4. It’s wonderful on pork chops. It just takes a little to get that wonderful, “I’ll never let myself run out of this stuff” flavor.
  5. Chicken. Chicken. Chicken. Chicken. Chicken.
  6. Chicken.

Continued Below…

Captain Rodney's Original Boucan Pepper Glaze

Captain Rodney’s Original Boucan Pepper Glaze

My favorite way to cook chicken is as follows:

I take chicken tenders, salt and pepper them, then marinate them in Italian Dressing (bottled or the kind you make with a mix) and a little honey. I try to let them marinate in the fridge in this mixture for at least 3 hours.

I heat my iron skillet on medium-high and add a mixture of butter and olive oil (the olive oil keeps the butter from getting too brown). Don’t use too much butter/olive oil – you want enough for the tenders to sizzle but you don’t want to drown them. When the skillet is hot, I cook each side for about 4 minutes (always use a meat thermometer when cooking chicken – you want 165 F).

When I put them on the serving platter, I go ahead and add a little Captain Rodney’s Original Boucan Glaze (Amazon link). Makes them feel good about themselves and makes the tenders disappear off of said platter likety split.

Skillet Chicken Tenders with Captain Rodney's Glaze

Filed Under: Chicken Recipes, Cooking Tips, Daily Gift Ideas for Foodies Tagged With: Chicken Tenders, Easy chicken tenders, skillet chicken tendersCaptain Rodney's Original Boucan Pepper Glaze

Winco Hamburger Smasher and Turner: Perfect for Diner-Style Burgers

June 27, 2019 By Joi Sigers

Winco Hamburger Smasher and Turner

Winco Burger Turner (and Smasher!)

I LOVE burgers. There, I said it. I love them more than words can even say. In fact, I wouldn’t spend too much time searching for words because that would be time taken away from eating burgers.

My favorite way to fix burgers is “diner-style,” just a food blogger cool way of saying, “burgers that are smashed into an iron skillet.”

Before we found  the HANDY as HECK Winco Burger Turner above (or as I call it, my smasher), it was a headache to smash the burgers into the skillet. I’d try to get my spatulas to go along with the plan, but they just weren’t built for it. You should’ve seen me, holding the spatula in one hand and placing a mug on top of the spatula with the other hand. The spatula took a beating, the mug felt anxious, and the cats laughed.

Perfectly embarrassing.

This crazy cool and inexpensive little tool has made life a lot easier. It’s also perfect for the grill – gets the burgers nice and flat. This makes them cook quicker and, in my opinion, makes them tastier.

Product Description from Amazon

  • Stainless steel construction
  • Wooden handle
  • Winco products range from tabletop to kitchen utensils to food preparation supplies
  • Winco products are used by all foodservice and hospitality industry experts worldwide

See Winco Burger Turner for more information!


Filed Under: Christmas Gift Guide, Cooking Tips, Daily Gift Ideas for Foodies, Gift Ideas for Cooks, Grilling, Kitchen Gadget Reviews Tagged With: gift ideas for cooks, gift ideas for foodies, Hamburger smasher, kitchen gadget reviews, Kitchen Gadgets

Next Page »

Primary Sidebar

Welcome to the Get Cooking Food Blog

My name is Joi (“Joy”) and Get Cooking is where I celebrate some of my greatest passions: Recipes, kitchen gadgets, gluten free food reviews, gluten free recipes, pig collectibles, chocolate, cookbooks, and coffee.

Lots of coffee…

  • Email
  • Instagram
  • Twitter

What’s New on the Food Blog?

  • Brilliant Organizer for Cans and Other Pantry Items… Even Dishes
  • Disposable Air Fryer Liners: Perfect for Fast Cleanups!
  • Vegan and Gluten-Free Salad Dressings, Mayo & Butter from Plant Perfect (Exciting New Products!)
  • Goodful Non-Stick All-In-One Pot: It Has all the Good and None of the Bad (Seriously, I Love This One!)
  • Torani Strawberry Flavored Syrup Makes VERY Memorable Tea, Matcha, Milkshakes, Smoothies…
  • Gorgeous Purple Dutch Oven… My Ideal Soup Pan!
  • As Simple as it Gets Japanese Broth Soup (The Possibilities are Endless)
  • Healthy and Delicious New Favorite Snack

Gluten-Free Recipes

Wedge Salad with Roasted Tomatoes, Bacon, Chia Seeds, Sauteed Onions, and Ranch Dressing

Wedge Salad, Starring Roasted Tomatoes

CauliPower Linguine Pasta with Meat Sauce

Caulipower: Quite Possibly THE Best Gluten-Free Pasta

A Wonderful Gluten-Free and Vegetarian Cookbook: Whole Bowls by Allison Day

Gluten-Free Lasagna with Explore Cuisine Green Lentil Lasagna Noodles

Easy Gluten-Free Lasagna with Explore Cuisine Green Lentil (No Boil!) Noodles

Tostadas with Refried Beans and Tomatoes

Fast & Easy Summer Meal: Meatless Tostadas

Gluten-Free White Chocolate and Pecan Cookies

Gluten Free Cranberry Pecan Cookies

Air Fryer and Rotisserie in One!

Instant Vortex Plus 10 Quart Air Fryer, Rotisserie and Convection Oven (Amazon link)

A Reminder for all Cooks…

Kitchen Accident Tracker

If my accident can prevent you, a pet, or a child from being hurt, it will have been worth it to me… read more here!

Footer

T-fal… As Good as Good Gets

The T-Fal Cookware Set (Amazon link), above, is absolutely one of the best cooking sets you’ll ever find. It’s on Amazon and available in several gorgeous colors.

Subscribe to Get Cooking

Fill in the form below to receive updates through e-mail whenever something new has been added to the food blog.


Powered by FeedBlitz

  • Email
  • Instagram
  • Twitter

Contact me through e-mail at joitsigers@gmail.com and/or connect with me through social media (see above). ~ Joi (“Joy”)

I do not claim to have taken all of the photographs on this website. I did not take any of the “product” or “affiliate” merchandise photos, nor do I claim to own them. If you are a photographer that sees something you want removed, simply e-mail me!

Copyright © 2022 Get Cooking Food Blog   xml sitemap   Privacy Policy   Crazy Tea Chick!