


Gluten Free Food Reviews

Wonderfully Delicious (and FUN) GoGo squeeZ Fruit & veggieZ Variety Packs

A Low FODMAP Dieter’s Dream Come True: Fody Condiments and Spices on Amazon

Torani Strawberry Flavored Syrup Makes VERY Memorable Tea, Matcha, Milkshakes, Smoothies…

As Simple as it Gets Japanese Broth Soup (The Possibilities are Endless)
Chicken Recipes

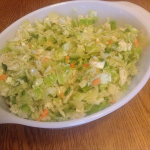
Chicken Salad with Eggs: You’ll Be Surprised How Much Flavor the Eggs Add!

An INGENIOUS Way to Prepare and Eat Chicken: Where Has this Method Been all My Life?!

How a Captain Named Rodney Can Make Your Chicken Extraordinary….

Mediterranean Diet Recipe: Chicken Parmesan with Fresh Basil Tomato Sauce and Polenta


Coffee Reviews

Kaldi’s ‘Tis the Season Coffee and a Beautiful Christmas Ornament: Perfect Gift for Coffee Lovers!

Steeped Coffee Review: The Fastest, Easiest Hot (or Iced!) Coffee Imaginable

Coffee Review: Kaldi’s Colombia Monserrate Elcy Causaya

Review: White Tale Coffee AND The White Tale Coffee Subscription Program


Kitchen Gadget Reviews

Taco Tuesday Electric Quesadilla Maker: Perfect for Lunch, Supper, Breakfast, AND For Taking to School or Work!

Adorable Wilton Halloween Cookie Cutter Set PLUS Tips for Baking with Children

Wilton Silicone Pie Crust Molds Make Fancy Pies Possible… Just in Time for Pie Baking Season!