• Skip to primary navigation
  • Skip to main content
  • Skip to primary sidebar
  • Skip to footer

Get Cooking!

Recipes, Kitchen Gadgets, Cookbook Reviews, Gluten Free Recipes...

  • Home
    • Contact
    • About
    • Privacy Policy
    • Sitemap
    • Store
  • Reviews
    • Cookware Reviews
    • Food Reviews
      • Gluten Free Food Reviews
      • Health Food Reviews
    • Bakeware
    • Candy Reviews
    • Coffee Reviews
      • Aerobie AeroPress Coffee and Espresso Maker
      • Coffee Makers & Grinders
    • Cookbook Reviews
      • Cooking Magazines
    • Kitchen Gadgets
    • Small Kitchen Appliances
  • Gifts & Collectibles
    • Candy Bowls
    • Christmas Shopping
    • Coffee Mugs
    • Canister Sets
    • Cookie Cutters
    • Gifts for Coffee Lovers
    • Gifts for Tea Lovers
    • Owls in the Kitchen
    • Pig Collectors
  • Recipe Index
  • How to Be a Better Cook
    • Baked Sweet Potatoes in the Oven
    • Cooking Videos
    • Perfect Baked Potatoes in Your Oven
You are here: Home / Archives for Recipes (P-W) / Summertime Favorites

Summertime Favorites

The Easiest Strawberry Milkshake Recipe Turns Out to be the Best Strawberry Milkshake Recipe

May 31, 2020 By Joi Sigers

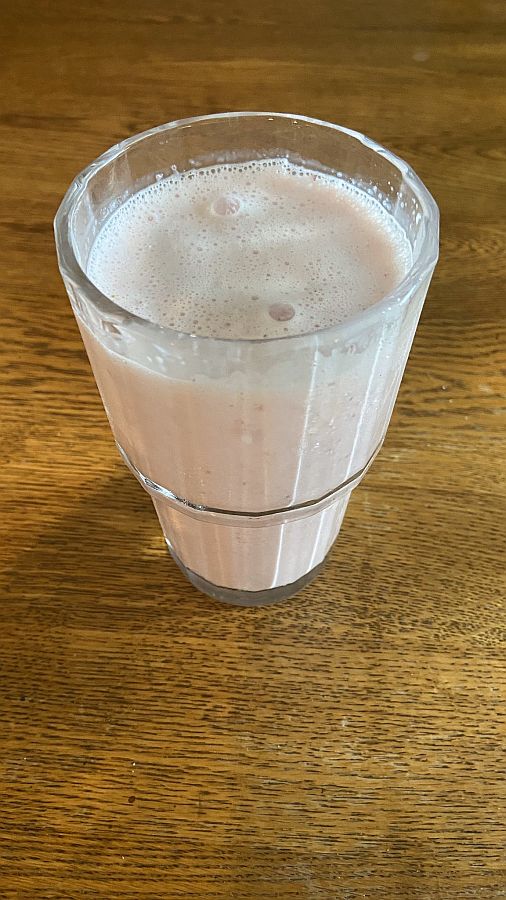
Strawberry Milkshake v

Quick & Easy Strawberry Milkshake

Some of my favorite things in live involve fruit.. so much so that I’ve always said if there ever were a fruit shortage, I’d be in a world of hurt…

I live for:

Strawberry Sundaes

Blueberries in Oatmeal

Blackberries on Pancakes

Strawberry Sundaes

Banana Smoothies

Strawberry Smoothies

.. and, last but not least, the obsession that brings us here today – Strawberry Milkshakes. I have been tinkering over the years with them for several reasons. I love them and couldn’t possibly survive a week without one. Have I ever tried? Heck no… who’d want to tempt that kind of fate?! I don’t order Strawberry milkshakes from restaurants because some milkshakes have gluten in them and I’m afraid of cross-contamination. Soooo, that has left me to my own devices – well the devices of me and my blender (Hamilton Beach Power Elite on Amazon).

I’ve tried milkshakes with vanilla, without vanilla, with added sugar, without added sugar, with all forms of vanilla and/or strawberry ice cream, with frozen strawberries, with fresh strawberries… oh, you name it, I’ve experimented with it. And loved every strawberrylicious sip!

The one I made recently was at the end of a very, very, very busy day (and, given that it’s 2020, it was of course a very emotionally charged and stressful day… 2020’s aesthetic). All I wanted was a basic glassful of strawberry comfort.

I  took 12 large strawberries, washed them and chopped them into chunks. I threw them into my blender and added 2-1/2 cups vanilla ice cream and 2 cups whole milk. The blender did its magic and the result was a knock out milkshake. As you can see, I didn’t even add whipped topping to the top followed by the obligatory “food blogger’s slice of strawberry on top.” Heck, I’m lucky my tired self even remembered to take a picture at all!

Who knows, maybe next time I’ll top it all off with a little whipped cream and position a big beautiful strawberry wedge on top. Maybe I’ll order special “milkshake glasses” by then. We’ll see. If 2020 gets its act together, I’ll do the same!


Filed Under: Fruit Recipes, Milkshake Recipes, Summertime Favorites Tagged With: easy milkshake recipe, milkshake recipe, strawberry milkshake

Tangy Southern Coleslaw: Fast, Easy, and Oh So Delicious!

January 20, 2020 By Joi Sigers

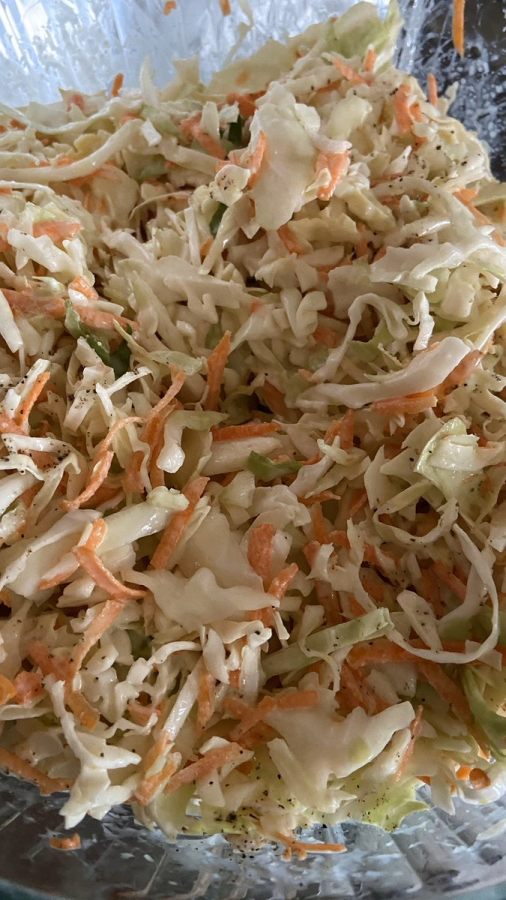
Tangy Southern Coleslaw

Tangy Southern Coleslaw

One of my biggest culinary obsessions is coleslaw – it goes with so many things.. and those few things it doesn’t conceivably go with?

I make it go!

The only drawback to loving a particular food so much is it makes you hyper picky when you order it in restaurants (or, worse yet, when a family member makes some and it tastes like a movie prop!). Let’s be honest, really truly wonderful coleslaw is a work of art and not many people pass for artists.

This particular easy, but delicious southern coleslaw is spot on – a work of art that’ll make you a Picasso.

My personal favorite coleslaw is usually vinegar-based, but I wanted to add some creamy tanginess to the mix (literally), so  I opted to sort of combine a creamy coleslaw and a vinegar coleslaw. That’s where the buttermilk comes into play. It may sound unusual, but it really does make things interesting.

And delicious!

Tangy Southern Coleslaw

Print this recipe
Joi Sigers
January 20, 2020
by Joi Sigers
Category Buttermilk Gluten Free Quick and Easy Recipes Salad Recipes Summertime Favorites
Persons
8
Tangy Southern Coleslaw

Ingredients

  • 1 (14 oz) Bags of Coleslaw Mix (with cabbage and carrots)
  • 1/3 Cup White Sugar + 2 TBS More!
  • 1/4 Cup Buttermilk
  • 1/2 Cup Duke's Mayonnaise (sub with Hellman's if necessary)
  • 1/4 Cup Whole Milk
  • 1-1/2 TBS Apple Cider Vinegar
  • 1 tsp Yellow Mustard
  • 1-1/2 TBS Lemon Juice
  • 1/2 tsp Onion Powder
  • 3/4 tsp Salt
  • 1 tsp Black Pepper

Instructions

  1. Pour the coleslaw mixes into a large bowl - preferably the one you'll be serving the coleslaw in.
  2. In a large glass measuring cup (or small bowl), combine the rest of the ingredients and stir well to combine.
  3. Refrigerate for at least an hour.
  4. Before serving, give the coleslaw a good stir and taste. If you need to add more salt and/or pepper, do so.

Tags

coleslaw recipe,
Southern coleslaw recipe

Notes:

  • I specify Duke’s Mayonnaise simply because it’s the one I always buy and use in my recipes. I simply think it’s the best. However, using Hellman’s will not alter the recipe. In fact, it’s pretty much the same… don’t tell my beloved Duke’s that though.
  • This is outrageously delicious on or beside a chili dog or pork sandwich.
  • One of the things that makes “Southern Coleslaw” in fact “Southern Coleslaw” is the sweetness. Our capacity to eat sweet food is unequaled. If you want to add a little less sugar, feel free to cut back a tad. However, a certain amount is very, very necessary to balance the acidity of the vinegar.


Filed Under: Buttermilk, Gluten Free, Quick and Easy Recipes, Salad Recipes, Summertime Favorites Tagged With: coleslaw recipe, Southern coleslaw recipe

Healthy Ginger-Cantaloupe Popsicles

July 24, 2017 By Joi Sigers

Ginger-Cantaloupe Popsicles
I recently got a fun new kitchen “toy” to enjoy and I’ve been doing just that. It’s a popsicle molds set and, trust me, you don’t want to muddle through the rest of the summer without your own.

I’ve made quite a few varieties but have to confess that it’s hard to beat iced coffee, almond milk, and a splash of vanilla syrup. It makes a Heavenly latte popsicle.

I’ll add more recipes in the coming days, but here’s one you’re sure to love. It’s from Terra’s Kitchen (Fresh Meal Delivery Service) and the popsicles are almost too beautiful to eat.

Almost.

Healthy Ginger-Cantaloupe Popsicles

3 slices of fresh ginger
1/4 cup sugar
1 ripe cantaloupe
Sliced strawberries (optional)
Popsicle forms and popsicle sticks

In a small sauce pan, add the sugar and 1/2 cup water over medium heat. Cook just until the sugar has melted. Remove from heat and drop in ginger. Set aside until cooled. (Remove ginger when ready to use!)
Slice cantaloupe in half and scoop out seeds. Spoon cantaloupe flesh into a blender. Blend until smooth.
Add just enough of the cooled ginger syrup to sweeten as desired. Save the remaining syrup for another use.
Pour into popsicle molds and freeze overnight. For a variation, push a few sliced strawberries down into the popsicle molds before freezing.


Filed Under: Fruit Recipes, Summertime Favorites Tagged With: Popsicle Recipe

Fast & Easy Summer Meal: Meatless Tostadas

July 12, 2017 By Joi Sigers

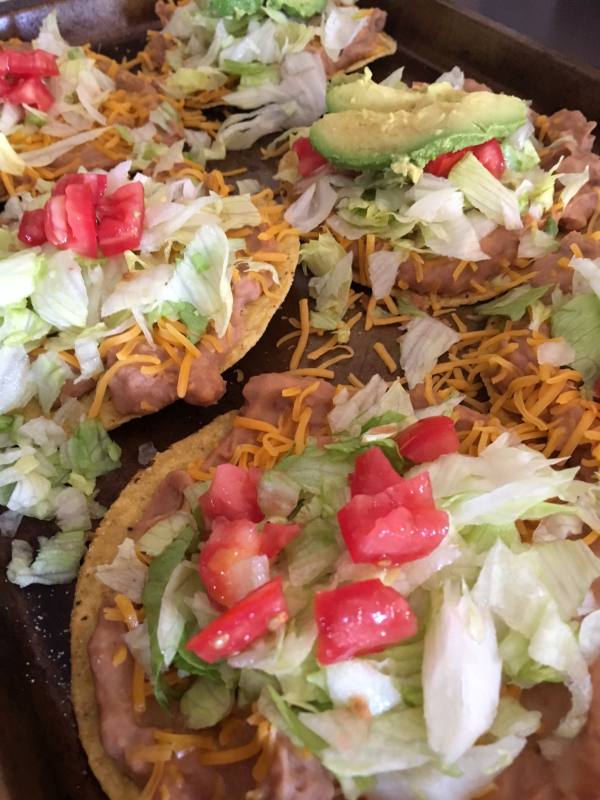
Tostadas with Refried Beans and Tomatoes

Given the fact that I have a food blog and talk about food without even taking a breath, you probably already know that I love to cook. In fact, I enjoy it so much that I stare in blank amazement when people say they don’t enjoy cooking.

Having said that, on the hottest days (and nights) of summer, I appreciate a quick, easy, and no oven required meal. These tostadas are so quick and easy to pull together and there are endless options to “make them your own.” They’re also great for eating on a budget – especially if you make them meatless.

The Toppings Are Your Call:

  • Refried Beans or Ground Beef w/Taco Seasoning
  • Cilantro
  • Shredded Cheddar
  • Mexican Crumbling Cheese
  • Green Onions
  • Shallots
  • Shredded Lettuce
  • Jalapeno Peppers
  • Chiles
  • Tomatoes
  • Pico de Gallo
  • Sour Cream
  • Salsa
  • Salsa Verde
  • Black Olives
  • Lime Juice
  • Roasted Corn
  • Roasted Red Peppers
  • Etc…

The NON-Recipe for Refried Beans Tostadas

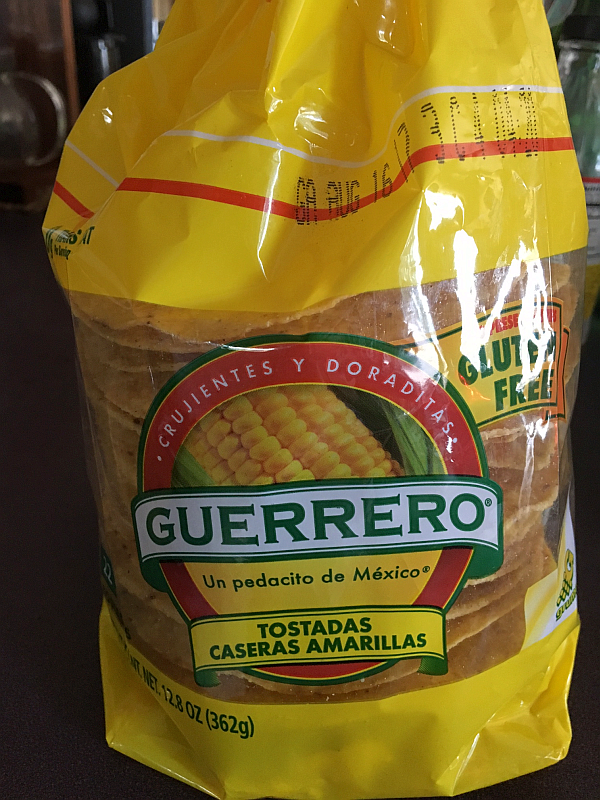
Guerrero Tostadas

There’s No Need to Even Heat These Tostadas

It all starts with the base: the Tostada shells.  I love the Guerrero Tostadas pictured above. They’re delicious and ridiculously inexpensive. That’s a combination I don’t take lightly.

Line a baking sheet (or several) with the number of tostadas you’ll be serving. There’s no need to heat the shells at all for tostadas.

Refried Beans: I use canned refried beans and am pretty darn brand-loyal. I buy Old El Paso Traditional Refried Beans almost exclusively. For 10 tostadas, I used two cans. Now you can use refried beans straight from the can for this recipe or to serve as is.  However, I love to add a little water (couple of tablespoons) to the beans when I first add them to the skillet, along with about 1/2 tsp of cumin and a splash of hot sauce. In full disclosure, I add cumin to more things than not. In this particular dish, I also added 1/2 cup of sour cream to the beans. It makes them creamier and dreamier.

Cook the beans on low, stirring frequently. Season with a little salt.

Tostadas with Refried Beans and Tomatoes

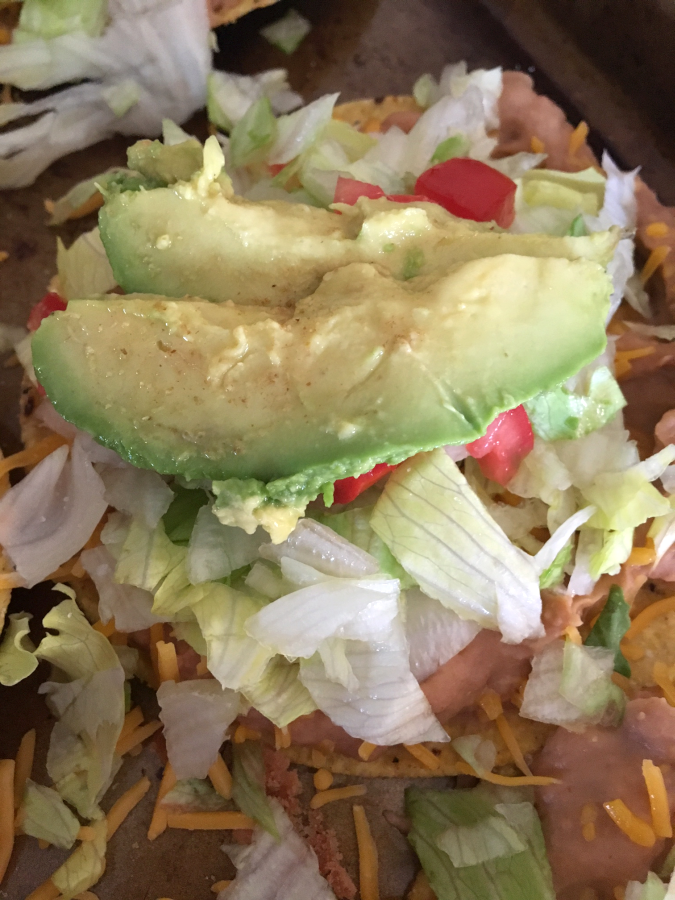
Make Some with Avocado and Some Without: Just In Case Someone Isn’t a Fan

When the beans are nice and hot, plop them evenly among the tostada shells, spreading them to the edges. Top the hot beans with shredded cheddar cheese so it’ll melt irresistibly into them.

Now this is where you can really get cute. Add whatever floats your boat at this point. Cilantro, shredded lettuce, tomatoes, black olives, scallions, shallots… you do you!

I add different toppings just about every time I make tostadas but the cast of characters almost always includes cilantro, shredded lettuce, tomatoes, sour cream, cheese, and avocado.

You’ll want to put the sour cream on top, if for no other reason than it looks cool. Finally, the thing that really seals the deal? Squeeze a little lime juice over the whole shebang.

I’m not sure why, exactly, but lime juice simply makes every single Mexican dish you can think of even better.


Avocado on Tostadas

Ideas for Side Dishes:

  • Rice
  • Tossed Salad
  • Chips and Salsa
  • Corn
  • Fried Potatoes


Filed Under: Cooking on a Budget, Gluten-Free Recipes, Quick and Easy Recipes, Summertime Favorites Tagged With: Gluten-Free Tostadas, meatless meal ideas, Refried Bean Tostadas

Surpahs 10-Inch Stackable Cake Stands Made of Bamboo Fiber are Gorgeous

July 5, 2017 By Joi Sigers

Surpahs Stackable Cake Stand
The links in this post are affiliate links, meaning I earn a small amount when you click through and make a purchase. This (of course) costs you nothing extra – it simply allows me to support my cat in the lifestyle they’ve become accustomed to!

One of my favorite things about having a food blog (or any of my blogs, for that matter) is the opportunity I have to review great cookbooks, food, kitchen gadgets, pots, pans, or brilliant beauties like the colorful Surpahs 10-Inch Stackable Cake Stand pictured here.

When I was contacted about receiving one of these stands in exchange for telling you about it, I wasn’t entirely sure what to expect.  I mean, it was obviously beautiful in the pictures sent to me. I’m full-on wild about colorful, out of the ordinary, and whimsical things,and I could tell (from the pictures alone) that this colorful cake stand was something I’d love.

However, I had no idea that it would be as gorgeous as it is in person. There’s an exceptionally, unmistakably “high quality” to these pieces that pictures, alone can’t possibly pick up.

Surpahs Stackable Cake Stand
Speaking of pictures – this cake stand was a particular challenge for me! I LOVE taking pictures of things I’m sent to review and take great pains to “set up” the right atmosphere, lighting, etc – everything I think will showcase it to its fullest.

With this cake stand, I found myself kind of flustered because there’s just no way to show you how beautiful it is!  Trust me, I tried every angle, but it’s “in person” beauty far surpasses its “in photograph” beauty. The quality you see in person simply can’t be completely appreciated in pictures.

Kind of like a sunset, a sailboat on a lake, or a deer eating leaves from a tree. The camera can only do so much.

Surpahs Stackable Cake Stand
This six piece set can be stacked together to create a beautiful display for cupcakes, cookies, slices of cake, dipped strawberries… just about anything you can think of.  You could also use it as three separate colorful serving platters.  They’re perfect for hamburger or taco bars or for “extras” when serving salads… you know, those components that some members of the family like, while others look at you like, “You can’t possibly think I’m going to eat that…” In our family, these foods include olives, cilantro, bacon bits, and onions.

The thing that makes this set so uncommonly beautiful is the new material, Bamboo Fiber.  In addition to looking fantastic, the bamboo fiber is also biodegradable, eco-friendly, and dishwasher safe.

Two words that are always music to my ears – dishwasher safe.

Edamame on a Surpahs Stackable Layer
Most stands pre-determine which plate goes on top because they’re various sizes (and the smallest gets top billing), but, since these are all the same size, you decide which color you want on top – orange, green, or pink. Naturally, this can change each time you use them.

Ahhh, the freedom of expression!

Surpahs Stackable Cake Stand
I am crazy about these stands (I say stands because I tend to think of this set as five different stands – three individuals, a 3-tier and a 2-tier, when one takes the night off). Not only are they gorgeous on your table when in use, they’re gorgeous sitting on a shelf or hutch when not in use.

See Surpahs 10-Inch Stackable Cake Stand for more information. Their price on Amazon is unbelievably low – meaning you can scarf one for yourself AND one or two for gift-giving. These are phenomenal.


Surpahs Stackable Bamboo Cake Stand

Filed Under: Daily Gift Ideas for Foodies, Dish Reviews, Gift Ideas for Cooks, Introduction, Reviews, Summertime Favorites Tagged With: cake stand, colorful cake stand, wedding cake stand

Summer Foods Americans Crave the Most….

June 22, 2017 By Joi Sigers

Grilled Chicken

Grilled Chicken Winglettes

Gotta admit, looking at the picture above – of some grilled winglettes my husband made not long ago – is kind of distracting me from this post. All I can do is sit and stare with my mouth watering like a faucet.

Next time, I really should do the story THEN post the picture. I’ll make a note of that. The husband is expert at all things with the grill and his chicken is legendary in our family. It’s that time of year again, so all of you other grilling legends are undoubtedly rolling up your sleeves and making your own magic.

For a recent story, the Postmates delivery app partnered with NationalToday.com to ask 2,000 Americans about their summer plans and summer meal preferences. The results are below.

TOP 5 SUMMER FOODS AMERICANS CRAVE THE MOST

#1: Hamburgers (69%)
#2: Hot dogs (55%)
#3: Steak (49%)
#4: Barbecued chicken (46%)
#5: Ribs (44%)

TOP 5 TOPPINGS AMERICANS LIKE TO PILE ON THEIR BURGERS

#1: Cheese (82%)
#2: Lettuce (77%)
#3: Ketchup (69%)
#4: Tomato (69%)
#5: Pickles (64%)

TOP 5 FIXINGS AMERICANS LOVE ON THEIR HOT DOGS

#1: Ketchup (25%)
#2: Chili (18%)
#3: Mustard (15%)
#4: Cheese (10%)
#5: Relish (8%)

U.S. CITIES THAT LOVE SUMMER HOT DOGS THE MOST

Postmates and NationalToday.com ranked cities across the U.S. based on the total number of summer hot dog deliveries in the past 12 months using the Postmates app, the frequency of these deliveries, and the overall preference for hot dogs over other foods.

#1: St. Louis
#2: Louisville
#3: Virginia Beach
#4: Kansas City
#5: Charlotte
#6: Sacramento
#7: Oklahoma City
#8: Orlando
#9: New Orleans
#10: Indianapolis
#11: Ft. Lauderdale
#12: San Antonio
#13: Raleigh
#14: Houston
#15: Pittsburgh
#16: San Francisco
#17: Denver
#18: Palm Springs
#19: Atlanta
#20: Las Vegas
#21: Phoenix
#22: Austin
#23: Chicago
#24: Dallas / Ft. Worth
#25: Los Angeles
#26: Portland
#27: Nashville
#28: Columbus
#29: Milwaukee
#30: Miami
#31: Seattle
#32: San Diego
#33: Washington DC
#34: Baltimore
#35: New York City
#36: Tampa
#37: Boston
#38: Jersey City
#39: Philadelphia

Source: https://nationaltoday.com/world/summer-solstice/

Cheeseburgers and Crinkle Cut Fries

Cheeseburgers and Crinkle Cut Fries… Yes, Please

For more stats, including what Americans plan to do this summer, visit: https://nationaltoday.com/world/summer-solstice/

No matter which toppings they prefer, Postmates is delivering free hamburgers or hot dogs to residents of 100+ cities (see the list here https://postmates.com/) who download Postmates and order throughout the first week of summer (Tuesday, June 20 through Sunday, June 25).

1. Download the Postmates app by visiting: springboard.postmates.com/summersun

2. Add any hamburger or hot dog to your cart from your favorite local or chain restaurant

3. Use code SUMMERSUN to get it for free


Filed Under: Grilling, Summertime Favorites, Table Talk Tagged With: Foodie news, summer food survey

Easy Vegetable Gardening: How to Grow Courgettes (Zucchini)

May 30, 2017 By Joi Sigers

Growing your own vegetables is one of the most rewarding things you can do in your garden. The good news is that anyone can have a go – you don’t need a degree in horticulture and it’s certainly not rocket science. All it takes is a packet of good quality seeds from a reputable suppliers such as Seed Parade, a patch of soil and a few basic garden tools. Regular watering and some sunny weather will do the rest.

Courgettes are some of the most versatile vegetables to use in the kitchen, and one of easiest plants to grow. Once established, they require hardly any attention and will reward you richly for your meagre efforts. In fact, all you need is two courgette plants as they will produce plenty of crops for the average family all summer long.


Sowing courgettes

Depending on the weather, you can sow courgettes indoors and plant out later, or sow them straight into the veg bed once the risk of frost has passed. For indoor sowing, you need small 7cm pots and fine seed compost, sowing compost or regular potting compost. Place a courgette seed about 1cm deep into each compost filled pot and water in. Leave on a sunny window sill or in a propagator to germinate, keeping the soil moist but not overwatered. After about 3 weeks, the courgette seedlings will be ready for a bigger 12cm pot with some fresh compost.

Once your courgette plants are strong enough, they’re ready for planting out. However, if they’ve been raised indoors, they’ll need to ‘harden off’ to get used to the outdoor conditions first, which will take about a week. Place the pots in an unheated room, or straight outside, and use a cloche or mini greenhouse to provide protection from the cold weather if necessary, particularly at night. This may not be necessarily if the weather is mild.

Alternatively, you can sow courgette seeds outdoors in a greenhouse or polytunnel, making sure to protect them with fleece at night in case of frost damage until it’s warm enough.

Of course, for those with little patience or limited time availability, you can skip the whole ‘growing from seed’ step completely. Instead, simply pop to your local garden centre and buy plug plants that are ready to go into the ground – simples.

Planting out courgettes

Once you’ve prepared your seedlings for planting out, or sourced courgette plantlets from the garden centre, wait for a nice warm day in late May or June, and pick a sunny growing spot that offers some protection from strong winds.

It may not look like it now but courgette plants will spread out – they need a lot of space. Once the plant starts growing, its leaves will become enormous and will shade out anything else growing nearby. When planting out, leave 1 metre between plants – honestly, it will all make sense in the weeks to come.

Courgettes are hungry plants; they love a rich soil. Spread some fertiliser (chicken or poultry manure pellets are perfect) around a 1 metre wide area around the plant, bearing in mind that the roots will spread as much as the leaves.

While the plants are still tender, they’re very appealing to slugs and snails, so make sure you have adequate slug protection in place – slug pellets (preferably organic) or a beer trap should do the job.

Once the plants are in the ground, keep the soil around them moist, making sure to water regularly and plentifully in dry weather. To help moisture retention and to keep the developing fruit off the ground, you can mulch around the plants with straw – but this is entirely optional and perhaps a step too far for the reluctant gardener.

Harvesting courgettes

If you’ve given your courgette plants plenty of water in the right growing conditions, you’ll see them thrive and grow happily, bearing gorgeous deep yellow flowers before producing fruit.

To harvest, cut the courgette at the base with a sharp knife, being careful not to damage the rest of the plant. Make sure you harvest your courgettes as soon as they reach the required size – they’re best picked smaller rather than larger for flavour.

Courgettes hold a lot of water and the fruit can get very big very quickly. In the middle of the summer, you could well be picking courgettes 4 times a week since courgettes are such prolific producers! Continued picking is important for the plant to keep producing.

You can, of course, let the courgettes grow to marrow size – they grow so quickly that this may happen anyway if you forget to harvest for a few days. However, large fruit will take a lot of energy from the plant and may stop the growth of new fruits.

Finally, don’t forget that courgette flowers are also edible – deep fried and stuffed courgette flowers are a delicacy!


Filed Under: Summertime Favorites, Vegetables Tagged With: how to grow courgettes, how to grow zucchini, vegetable gardening

Bacon and Eggs Salad with a Creamy Mayo Dressing

May 24, 2017 By Joi Sigers

Bacon and Eggs Salad
Bacon and Eggs Salad 
My love of animals, birds, butterflies, and bees is so great that it’s a part of my DNA. I’m somewhere between a modern day Snow White and Ellie May Clampett (without the little men or pigtails – though I’d kind of fancy having both around).

As you’d expect, I only buy cage-free eggs. They cost a little more, but the way I see it.. it’s more than worth it. The thought of any animal being confined and miserable – unable to enjoy fresh air, sunshine, and… well… life – makes me miserable and that’s a feeling I’m not wild about. The way I see it, if we were to all DEMAND better for animals (be their voice, if you will), their treatment will improve.

Talk about worthwhile goals!

When I saw Nellie’s Free Range Eggs website, the first thing that caught my eye was a precious picture of a beautiful little girl holding a beautiful hen like a cherished pet. Not only am I obsessed with animals, having raised three beautiful little girls of my own – I’m terribly partial to that “critter” as well!

Above the precious picture were the words that have stuck with me… “We Love Our Hens.” Maybe it’s because I’m a sentimental animal lover with few rivals for the title of Queen Sentimental Animal Lover, but that struck a chord with me. The love for their hens has led Nellie’s Free Range Eggs to be Certified Humane (click the link to learn exactly what this means).

Teaching Kids About Healthy Cooking and Humane Living

{Continued Below…}

Nellie's Free Range Eggs Hen
My Buddy, the Nellie’s Free-Range Eggs Hen (My Cats Love Her)
I’m a huge advocate for teaching girls and boys how to cook (safely, healthily, and deliciously). When our girls were growing up, they took turns helping in the kitchen. I showed them simple things like…

  • how to always turn the pot handles toward the back of the stove
  • how to pour ingredients safely to keep them from splattering all over your face
  • how to handle knives without incident
  • where to store eggs in the fridge (not on the door)
  • what foods need refrigeration and what ones don’t
  • how garlic powder and an iron skillet make the best burgers ever
  • etc, etc, etc..

While it wasn’t really an issue when my girls were children, today parents and grandparents would be great to teach their little cooks about food allergies and intolerances. Teaching them that it’s always considerate to take things like allergies into consideration when cooking for others.

I’ve also preached to my daughters (and anyone else who’ll listen!) about the importance of mastering certain recipes that’ll serve you well throughout your life. Egg recipes are among the ones that I think are most important to master.

Everyone should be able to make EXTRA special…

  • fried eggs
  • scrambled eggs
  • boiled eggs
  • egg salad (Best Egg Salad Recipe EVER)
  • omelets

As is the case with many recipes, perfecting egg recipes simply takes practice – and attention to detail. I love eggs to distraction – I guess that’s why I have (over the years) worked so hard to perfect my egg recipes. It’s why I’ve always found ways to get eggs into as many meals as possible.

They aren’t just for breakfast you know!

When it comes to summer meals, one of my favorite ways to enjoy eggs is a Bacon and Eggs Salad with a Creamy Mayo Dressing.

{Bacon and Eggs Salad Recipe Below…}

Bacon and Eggs Salad and Dressing

Bacon and Eggs Salad

Round up the usual suspects: Romaine Lettuce (or your favorite leaf lettuce – don’t let me tell you what to do), chopped green onions, bacon, hard-boiled eggs (chopped), tomatoes if you’ve got them… and any other vegetables you want to invite. Most of the time, I want the bacon and eggs to be the stars they are, so I keep things ridiculously simple.

Creamy Mayo Dressing:

For some reason, the dressing looks almost yellow in the picture below, but don’t let it fool you.. it’s white. I guess the mid-day sunlight coming through the kitchen window pulled a fast one.

1 cup mayo (I love Duke’s and Hellman’s)
4 tsp apple cider vinegar
3 TBS sugar
salt and pepper

This is the basic dressing I use for the Bacon and Eggs Salad – but you can jazz it up a little with chopped chives (fantastic on just about any tossed salad) or other herbs. You can also add a little lemon juice if you so desire. Again, I don’t want anything upstaging the bacon and eggs, so I keep it basic. As you can see from the pics, the last time I made this I didn’t even involve tomatoes. They sat in a bowl looking at me but I was like, “Nah, I’m good…”

{Concluded Below…}

Hard Boiled Eggs
Hard-Boiled Eggs without Pepper? I Do NOT Think So!
 As long as we have our children’s attention, we should also teach them about compassion. Along with my love for great, healthy food and cooking, I passed on to my girls a great love and compassion for every human and animal involved in the process – from farm to table. The kitchen is one of the easiest places to do this. Strike up conversations with your kids about the importance of things like supporting local farmers and buying free-range eggs. Visit Nellie’s Free Range Eggs with them (they’ll love the pictures!) and show them “the right way” to do a business.

Nellie's Free Range Eggs
I was sent a gift certificate for Nellie’s Free-Range Eggs in exchange for telling you all about them. I decided to do more than just tell you about them… I decided to RAVE because everything about the way Nellie’s does business makes this animal lover’s hear soar.

Hard-Boiled Eggs

Place your free-range eggs in a saucepan and cover them with cold water. Place the pan on high heat and cook until it reaches the boiling point. Take the pan off of the heat (don’t forget to turn off your burner… I used to be AWFUL about that!) and cover the pan. Allow the eggs to sit in their hot bath for about 13 minutes. Peel, pepper and enjoy!

Hard Boiled Eggs

Filed Under: Breakfast and Brunch, Food Reviews, Gluten Free, Quick and Easy Recipes, Salad Dressings, Salad Recipes, Summertime Favorites Tagged With: Bacon and Eggs Salad, free-range eggs, Salad Dressing with Mayo, salad recipe

Tantalising Tips for Impromptu BBQs

April 13, 2017 By Joi Sigers

Spring and summer bring ample opportunities for impromptu entertaining, and there’s nothing quite like an impromptu BBQ. Spring bank holidays are made for them. So long as the weather isn’t a complete wash-out, the first BBQs of the year can go ahead in all but the most turbulent of conditions.

If you have a multi-functional kitchen space to retreat to if the weather turns then all the better. BBQ food tastes just as good eating inside as it does eating in the great outdoors.

BBQs are notorious for taking an age to cook. Blackened on the outside, pink undercooked meat on the inside is a turn off for even the most hardy meat eaters. You definitely don’t want salmonella to become your BBQ special.

Nevertheless, BBQs are a really fun and relaxed way of entertaining and they don’t have to take a huge amount of organisation. Here are our top tips and recipes for an impromptu, bank holiday BBQ bonanza – inspired by UK kitchen specialists The Brighton Kitchen Company.

Make the call

You’ve woken up on a bank holiday wondering what to do with yourself. You fancy a lazyish day, but would love to spend time with your friends and family. Organising a meal out might not work. Short notice bookings for large groups on a Bank holiday are hard to come by. Besides, you fancy pottering at home.

Don’t procrastinate. The sun is shining and it’s time to bring out the garden furniture that’s been locked away all winter. Make the call to the nearest and dearest, knock on the neighbour’s door and let the cat out of the bag. The BBQ is coming out and everyone is invited.

Supermarket sweep

After a quick shower, slip into your new spring apparel and make a list. You need to make a trip to the supermarket, but there’s no time to waste. Having a list will keep you focused, save you time and save you money. Here’s a basic list to get you started:

  • Keep it simple. Wine (red and white), beers and Pimms
  • Sparkling water
  • Lemonade
  • Juice
  • Chicken drumsticks and thighs (lots)
  • Fish (mackerel is great for the BBQ)
  • Burgers (only good quality ones will do)
  • Halloumi
  • Peppers
  • Courgettes
  • Red onions
  • Mixed salad
  • Cucumber
  • New potatoes
  • Chives, parsley, thyme, mint (all fresh)
  • Burger buns
  • Sauces (ketchup)
  • Olives
  • Lemons
  • Oranges
  • Strawberries
  • Dips
  • Posh crisps
  • Cream
  • A couple of large frozen pavlovas (yes you need a pudding, but you don’t have time to make your own).
  • A bag of ice (for the Pimms and the beer bucket)

The best chicken seasoning ever

We love this recipe for magic dust and barbecue sauce (pimped up ketchup). It makes barbecue chicken taste fabulous. Rub the magic dust liberally over chicken before cooking. It works for rubbing over anything, including vegetables so making a jar before the spring arrives means you’ll be all ready to make the tastiest BBQ food without any fuss.

The Prep

In no particular order:

  • Boil new potatoes. Drain and while warm, crush slightly. Add knobs of butter and chopped chives
  • Prep a salad
  • Put together some rustic halloumi kebabs
  • Make 2 large jugs of Pimms with lemonade, the obligatory chopped fruits, cucumber and mint leaves, and plenty of ice
  • Before you get distracted with the BBQ, take pavlovas out of freezer to thaw
  • Get your cheats BBQ meat in the oven (see below)


The BBQ

Your BBQ should be cleaned and oiled after every use, so hopefully there’ll be no issues for you to uncover it in its gleaming glory. Get your BBQ nice and hot before you use it to burn off any crud.

Cook your halloumi kebabs first and transfer to oven (just in case there are any vegetarians). Burgers are next. When burgers almost done, move to one side and put your cheats chicken on the BBQ (see below). Mackerel can go on last. It won’t take long. When the fish is cooked, sprinkle liberally with chopped herbs and serve with a wedge of lemon.

Cheats BBQ meat

You don’t want to spend hours slaving over the BBQ, so put your chicken pieces rubbed with magic dust onto a tray and cook in the oven. Time it right so they are just cooked, but not browned before you transfer them to the BBQ for finishing off.

Brush chicken pieces with the pimped up ketchup and place on the BBQ. Keep turning and brushing sauce on as required. Just as the sauce turns syrupy and the chicken skin gets crispy you are all ready to serve. Some blackening is OK, but try and keep that to a minimum. Let the chicken rest for a few minutes before serving.

Top 3 BBQ tips

  1. Don’t fiddle or poke and definitely don’t squeeze all of the lovely juices out of meat.
  2. Brush sauces on at the end. Marinating meats for the BBQ may seem like a good idea, but if the marinade has a high sugar content it will burn very quickly on a BBQ, leaving the glaze tasting bitter.
  3. Invest in a thermometer. Overcooking is just as sinful as undercooking. You’ll be able to check the exact temperature of meat, making sure meat is cooked through perfectly.

Oven tips

If you need to keep food warm as the BBQ turns out different offerings at different times, transfer barbecued meats to an oven proof dish and cover with foil or greaseproof paper. Pop in the oven at a setting between 140 degrees and 165 degrees Fahrenheit.


Filed Under: Cooking Tips, Grilling, Summertime Favorites

The Veggie-Loving Cowboy’s Caviar (Recipe)

December 14, 2016 By Joi Sigers

The Veggie-Loving Cowboy's Caviar
You just gotta love irony, don’t you? Here I am, an avid cook/baker, and food blogger and one of my husband’s favorite things I make doesn’t even require a minute of cooking time.

Doesn’t even need a good nuking!

The boy loves Cowboy Caviar like it’s his job. I try to make some up as often as good common sense and reason dictate (in spite of the fact he’d eat it every week, left to his own devices).

The cool thing about Cowboy Caviar is you can go all “free kitchen spirit” and throw in your own favorite flavors – as long as you stay reasonably close to the proportions and remember that everything does need to fit on a tortilla chip.

The recipe below is how I made this particular batch – I honestly don’t think I’ve made two ever exactly the same. If this is too much jalapenos for you, cut the amount. The same goes for the salt – if you’d like more, add more – if you want less, add less. Just go slowly with the salt because you don’t want to overpower all the flavors going on.

Cowboy Caviar is a favorite “go to” recipe for Summer lunches and suppers but it’s also IDEAL for busy times of the year, like the holidays and Christmas when we’re (quite honestly) too busy to even think about cooking!

As I’m serving Cowboy Caviar, I like to drizzle a little extra EVOO on top – makes it shiny and, what can I say, I’m crazy about the flavor.

The Veggie-Loving Cowboy’s Caviar

Print this recipe
Joi Sigers
December 14, 2016
by Joi Sigers
Category Appetizers Gluten Free Quick and Easy Recipes Summertime Favorites
The Veggie-Loving Cowboy's Caviar

Ingredients

  • 1 large green bell pepper
  • 1 large sweet onion
  • 2 cups frozen corn (thawed)
  • 3 cans black-eyed peas (drained)
  • 1 can black beans (drained and rinsed)
  • 2 Tbs diced jalapeno from a jar
  • 1 tsp of the juice from the jalapenos
  • 1 Tbs + 1 tsp minced garic
  • 1/2 Tbs Kosher salt
  • About 10 baby carrots shredded or diced
  • 2 celery stalks, finely diced
  • Pepper, as desired
  • Optional: 2 TBS chopped parsley or cilantro

Instructions

  1. Combine everything in a large bowl and stir well. That's it!

Tags

Cowboy Caviar recipe

Pictured: My beloved Pioneer Woman bowls my daughter Brittany gave me for my birthday. They’re two of a three part set that are just gorgeous. They’re available in most Wal-Marts, as well as online.  Click here to find where you can buy them online.

The Veggie-Loving Cowboy's Caviar

Filed Under: Appetizers, Gluten Free, Quick and Easy Recipes, Summertime Favorites Tagged With: Cowboy Caviar recipe

Next Page »

Primary Sidebar

Welcome to the Get Cooking Food Blog

My name is Joi (“Joy”) and Get Cooking is where I celebrate some of my greatest passions: Recipes, kitchen gadgets, gluten free food reviews, gluten free recipes, pig collectibles, chocolate, cookbooks, and coffee.

Lots of coffee…


  • Email
  • Instagram
  • Pinterest
  • RSS
  • Twitter

Search for Recipes and Reviews

What’s New on the Food Blog?

  • Great New Obsession: Silicone Loaf Pans!
  • An INGENIOUS Way to Prepare and Eat Chicken: Where Has this Method Been all My Life?!
  • Fellow Purple Fanatics, You’re Going to LOVE These Dishes
  • Quick and Easy Meal Ideas: “Nights Off” at Home with Less Stress and Less Mess
  • 2020 Gift Ideas for Cooks and Foodies: A Beautiful Handmade Ceramic Bowl
  • Chili Tips of the Trade and a Kitchen Tool You Absolutely MUST Have
  • Clorox Scrubmates with Handheld Scrubber
  • The Duke’s Mayonnaise Cookbook: A Cookbook Deserving of the Name!

Gluten-Free Recipes

A Wonderful Gluten-Free and Vegetarian Cookbook: Whole Bowls by Allison Day

Pumpkin Stuffed Green Lentil Cannelloni

Gluten-Free Pumpkin Stuffed Green Lentil Cannelloni

Gluten-Free Lasagna with Explore Cuisine Green Lentil Lasagna Noodles

Easy Gluten-Free Lasagna with Explore Cuisine Green Lentil (No Boil!) Noodles

Tostadas with Refried Beans and Tomatoes

Fast & Easy Summer Meal: Meatless Tostadas

Gluten-Free White Chocolate and Pecan Cookies

Gluten Free Cranberry Pecan Cookies

Gluten Free Pecan Sandies

Gluten Free Pecan Sandies Recipe

Footer

T-fal… As Good as Good Gets

The T-Fal Cookware Set (Amazon link), above, is available in several gorgeous colors.

Subscribe to Get Cooking

Fill in the form below to receive updates through e-mail whenever something new has been added to the food blog.


Powered by FeedBlitz

  • Email
  • Instagram
  • Pinterest
  • Twitter

Contact me through e-mail at joisigers@aim.com and/or connect with me through social media (see above)!

I do not claim to have taken all of the photographs on this website. I did not take any of the “product” or “affiliate” merchandise photos, nor do I claim to own them. If you are a photographer that sees something you want removed, simply e-mail me!</font size>

Copyright © 2021 Get Cooking Food Blog   xml sitemap   Privacy Policy   Color Me Gluten Free!