• Skip to primary navigation
  • Skip to main content
  • Skip to primary sidebar
  • Skip to footer

Get Cooking!

Recipes, Kitchen Gadgets, Cookbook Reviews, Gluten Free Recipes...

  • Home
    • Contact
    • About
    • Privacy Policy
    • Sitemap
    • Store
  • Reviews
    • Cookware Reviews
    • Food Reviews
      • Gluten Free Food Reviews
      • Health Food Reviews
    • Bakeware
    • Candy Reviews
    • Coffee Reviews
      • Aerobie AeroPress Coffee and Espresso Maker
      • Coffee Makers & Grinders
    • Cookbook Reviews
      • Cooking Magazines
    • Kitchen Gadgets
    • Small Kitchen Appliances
  • Gifts & Collectibles
    • Candy Bowls
    • Christmas Shopping
    • Coffee Mugs
    • Canister Sets
    • Cookie Cutters
    • Gifts for Coffee Lovers
    • Gifts for Tea Lovers
    • Owls in the Kitchen
    • Pig Collectors
  • Recipe Index
  • How to Be a Better Cook
    • Baked Sweet Potatoes in the Oven
    • Cooking Videos
    • PERFECT Baked Potatoes in Your Oven
You are here: Home / Archives for Reviews / Table Talk / Health and Fitness / Gluten-Free Recipes

Gluten-Free Recipes

Wedge Salad, Starring Roasted Tomatoes

May 12, 2022 By Joi Sigers

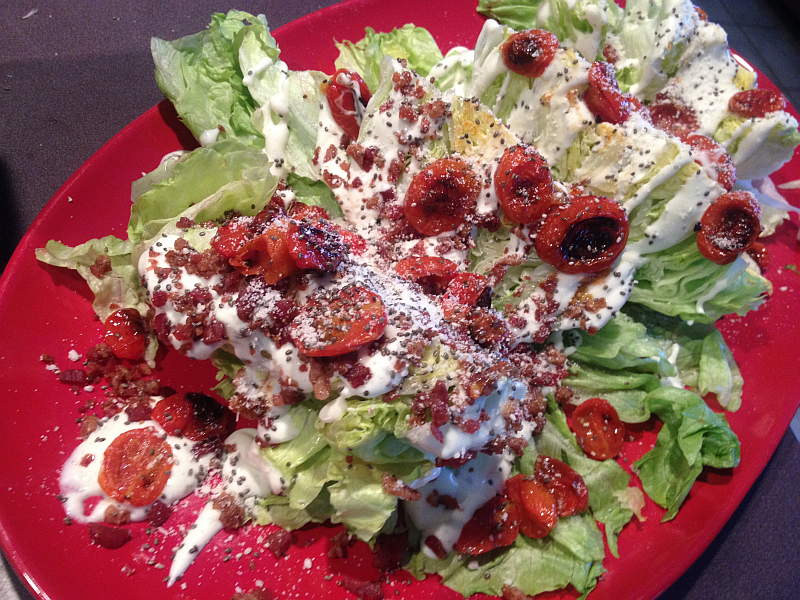
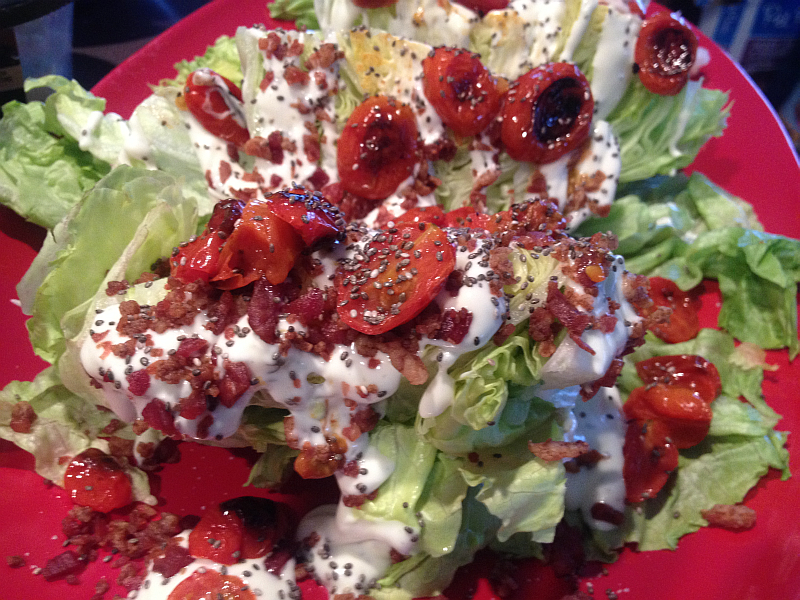
 Wedge Salad with Roasted Tomatoes, Bacon, Chia Seeds, Sauteed Onions, and Ranch Dressing

Last night I made what instantly became a Salad Legend in our kitchen: A wedge salad with bacon, chia seeds, ranch dressing, and the main attraction, roasted grape tomatoes.

I seldom give either sautéed onions OR bacon second billing to anything, yet here BOTH of them are… playing second fiddle to the humble, miniature grape tomato.

Wedge Salads: Iceberg Lettuce’s Call in Life

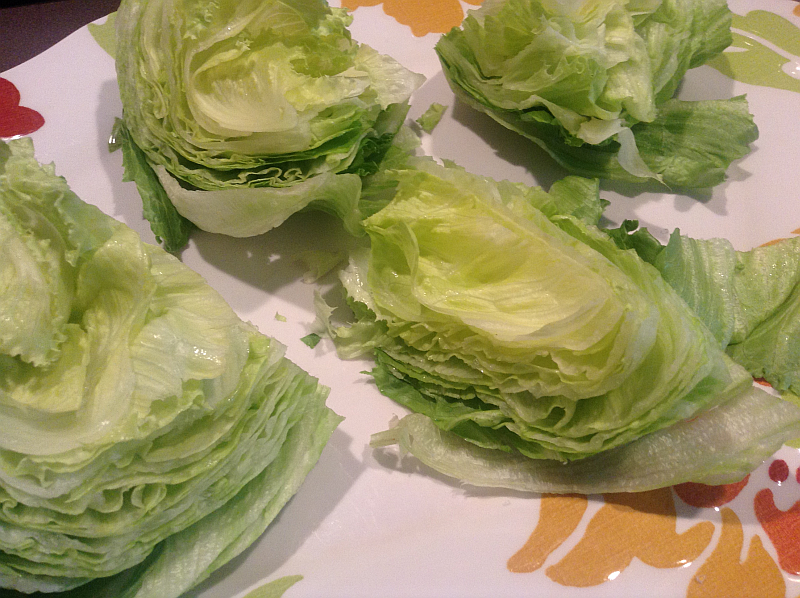
Iceberg Lettuce for Wedge Salad

Wedge Salads, Fixing to Happen

For a great wedge salad, you have to start with a fresh, crisp, clean, beautiful head of iceberg lettuce. Cut it into fourths and salt it a little under, over, around, and through. Iceberg lettuce has a shy flavor, you have to coax it out with a little salt.

Place your wedges on a plate and pour either Ranch Dressing or Blue Cheese Dressing on top – be generous.

Now, add your favorite toppings. You can choose from..

  • crumbled, cooked bacon (or bacon bits if you’re in a hurry or don’t want to mess up a skillet)
  • chopped tomatoes (grape or cherry tomatoes – roasted or not – are ideal for wedge salads)
  • green onions
  • crumbled Blue Cheese or Feta
  • sautéed onions
  • roasted vegetables
  • roasted corn (YUM!)
  • Chia seeds
  • sunflower seeds
  • etc…

A wedge salad can be as quick and easy or as elaborate as you want it to be.

The wedge salad pictured at the top (and at the bottom of the post) involved a little more time to make than the average wedge salad, but when it comes to sautéed onions and roasted tomatoes, I have all the time in the world.

How to Roast Grape Tomatoes

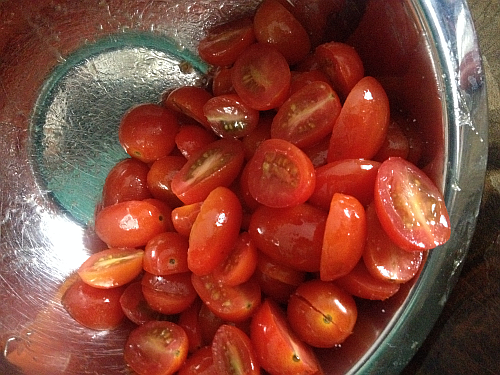
Grape Tomatoes for Roasting

Grape Tomatoes

Preheat the oven to 400 degrees. Slice the grape (or cherry) tomatoes and place them in a bowl. Drizzle them with olive oil, then season them with Kosher Salt.  Depending upon your preference AND depending upon what you’ll be eating at this particular meal, you could also drizzle a little Balsamic Vinegar on top of the tomatoes.

There are endless herb possibilities, too, but for this wedge salad, I just wanted to taste the roasted tomatoes… nothing but them in all their glory.

Large tomatoes or Roma tomatoes generally take upward of 30 minutes to roast, but the little guys don’t take quite as long.  Grape (or cherry) tomatoes usually begin to caramelize in about 20 minutes.  You’ll want to take them out and give them a quick little flip about halfway through the cooking time.

Don’t let the dark color rattle you. As cooks, when something turns dark, it usually means a trip to the garbage can, followed by another trip to the store – but when roasting vegetables, you want the darkness… that’s where the flavor is.

A word about roasting – I don’t want to venture too far off the beaten path here, but roasting vegetables is a woefully underrated and underused way of enjoying sides. Most vegetables can be roasted using the same approach I described above – most simply need more time under the heat.  Roasting vegetables brings out the flavor like few things ever could. Experiment with oils, seasonings, and even vinegars to mix things up.

Pan roasting on the stove-top (simply putting food into a hot skillet briefly) is a great way to bring out the deep, intense flavors of spices and herbs. Just keep an eye on them, they’ll burn fast.

Dressings for Wedge Salads

I favor using Blue Cheese Dressing or Ranch. I almost always make my own dressing but also love using Hidden Valley Ranch packets to whip up a great Ranch dressing. When it comes to dressing, I do prefer to make my own and, during the warmer months, I often have at least one made up at all times. During the colder months, when we aren’t having salads quite as often, I’ll turn to bottled dressing.

Topping Things Off

To finish off the presentation beautifully, and tastefully, add crumbled cheese (blue, mozzarella, or feta), bacon, snipped parsley or chives, sunflower seeds, salt, pepper, and/or chia seeds. Just find the combo that makes you smile.

Wedge Salad with Roasted Tomatoes, bacon, and Chia Seeds.

Wedge Salad

**** If you have to eat gluten free, always check everything you put on your plate and into your mouth. Never “assume” salad dressings, bacon bits, and all salad toppings are gluten free. Make  sure the label says “gluten free.”

Also See: Ideas for Salads and Gluten Free Salad Toppings

Filed Under: Gluten-Free Recipes, Salad Recipes Tagged With: how to make a wedge salad, salad recipe, wedge salad

Caulipower: Quite Possibly THE Best Gluten-Free Pasta

February 1, 2022 By Joi Sigers

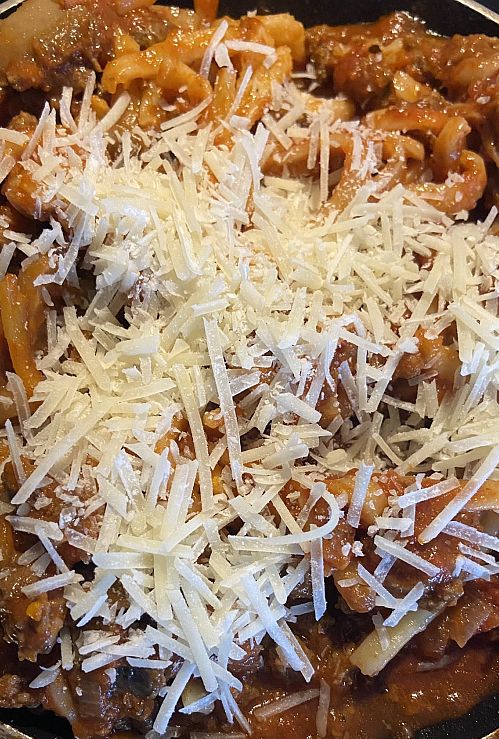
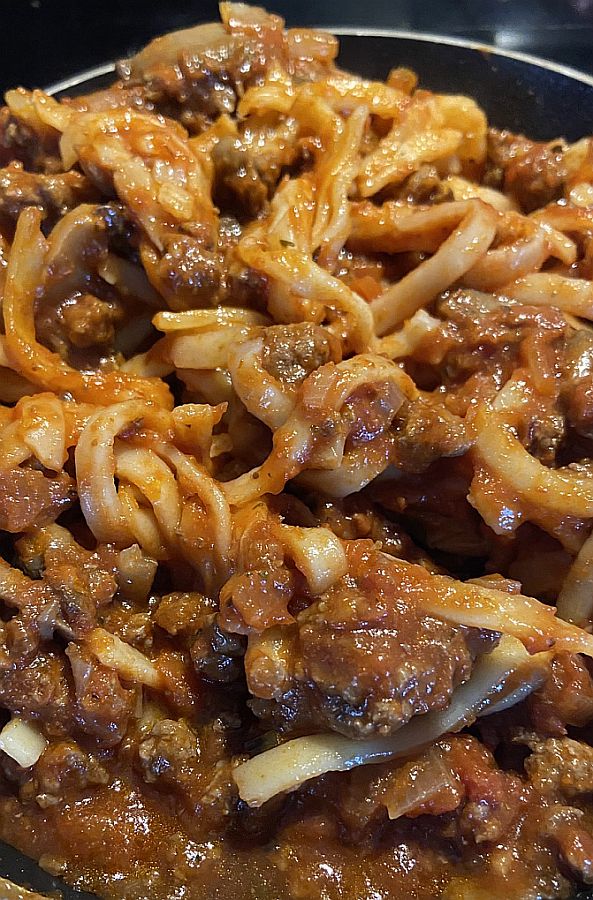
CauliPower Linguine Pasta with Meat Sauce

Caulipower Linguine with Meat Sauce

Years ago, when I had to give up gluten and wheat (health reasons), the first f0ur things I thought of were…

  • doughnuts
  • pasta
  • fried catfish
  • pizza

These are four of my favorite things in life and have been since my life began. I was afraid there’d be no hope to enjoy these great loves ever again and, frankly, with doughnuts, my prediction held true. There ARE gluten-free doughnuts, of course, but they are not the ones I remember from bakeries.

Until fairly recently, the pizza and pasta prediction also held fast, but lately, great strides have been made and (as a pasta and pizza fanatic) I couldn’t be more thankful.

However… when it comes to gluten-free pasta, it has always been a case of, “this one is pretty good” or “this one’s acceptable” instead of anything close to, ‘Holy cats, this gluten-free pasta is outstanding and tastes like the pasta I remember!”

Then I found Caulipower’s new gluten-free pastas – let’s just say it’s a GAME CHANGER.

(Review Continued Below….)

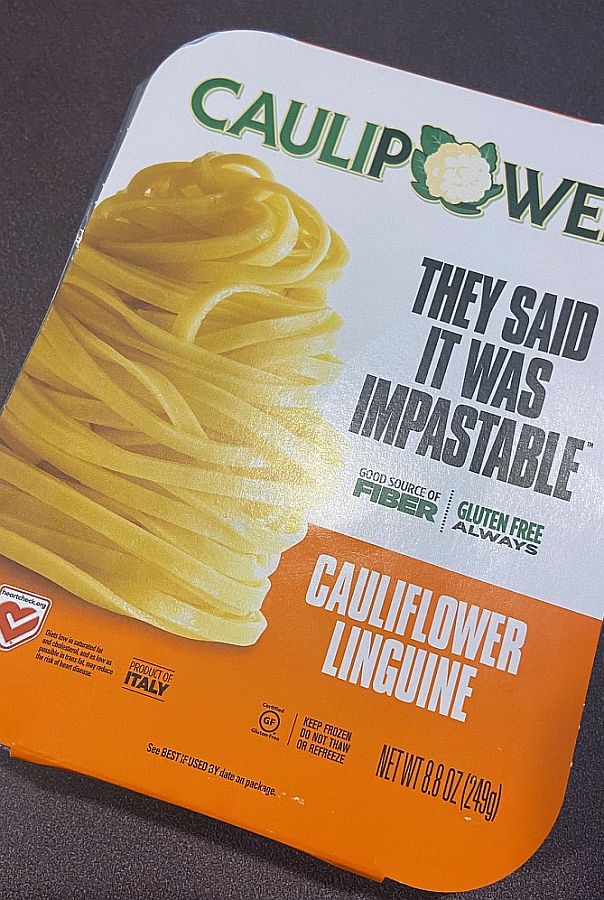
CauliPower Pasta

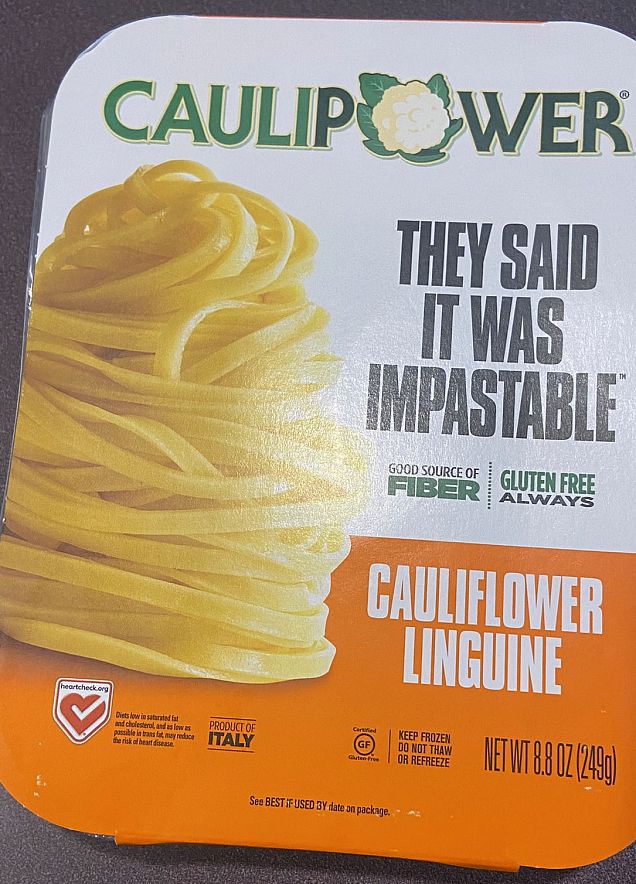
Caulipower Linguine

Caulipower is a brand I’ve been familiar with for a while because I buy their gluten-free pizza crusts (Amazon link) and gluten-free pizzas (they’re outstanding and I actually now prefer cauliflower crust to regular gluten-free crust). When my youngest daughter told me they had come out with gluten-free pasta, I’m not even exaggerating… I went to the store immediately. They’re in the frozen section and, while I first wondered about them being packaged frozen, I now LOVE the fact. This allows them to cook in just three minutes!

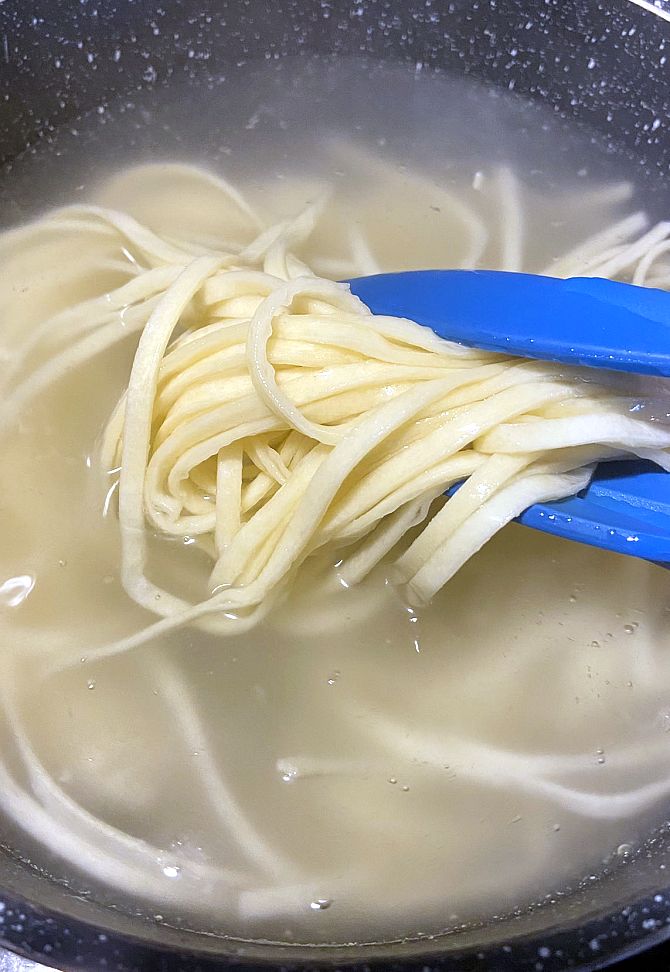
THREE MINUTES! Simply boil the water, add the frozen pasta, stir, and get ready to plate the deliciousness. The first one I tried was the Caulipower linguine because I’ve had difficulty finding linguine in a gluten-free pasta AND I love it.

For anyone who loves “meal prep hacks,” pasta night doesn’t get any better. Simply make up your pasta sauce (I always add ground beef, garlic, onions, green pepper, and mushrooms) and put it into a container in the refrigerator. When it’s time to make supper, warm up your sauce and cook your three minute pasta!

CauliPower Linguine Pasta

CauliPower Linguine Pasta

I love that the portion is perfect for two people (with a little left over even) and the fact that it cooks so quickly makes it IDEAL for busy weeknights. The best thing, however, is the fact that it is delicious! I added a little salt to the water like I do with all pasta, then added it to a meat sauce I had made beforehand.

While you could, of course, simply top the pasta with sauce, I thought adding it TO the meat sauce would make sure there was no cauliflower taste to detect. Mind you, I am obsessed with cauliflower, so it would make me giddy if there was a cauliflower taste but my husband is not a cauliflower fan, so I wanted to make sure that IF there was any flavor there, the sauce would mask it.

I tasted the pasta before adding it to the sauce and, even then, it was simply outstanding – no cauliflower taste and, best of all, it had the true consistency of “normal” pasta. Most gluten-free pasta you find in the stores is tough and not remotely “pasta-like” when it comes to the mouth feel. This one is so perfect it nearly brought a tear to my pasta-missing eye.

But it gets better.

If you’re familiar with gluten-free pasta, you know that leftovers are hideous. Gluten-free pasta, after being refrigerated and warmed-up gets even tougher. Not Caulipower pasta! When I warmed it up the next day, it tasted just like I had just made it fresh.

Now that’s what I’m talking about.

(Review Wrapped Up Below…)

CauliPower Linguine Pasta with Meat Sauce

CauliPower Linguine Pasta with Meat Sauce

Before allowing you to get on with your life, I just wanted to point out two things to let you know just how excited I am about Caulipower pasta and how thrilled I am to have found it:

  1. This is NOT a paid post, NOT sponsored, and NOT in any way associated with the Caulipower brand. I was NOT sent coupons or products to review. This is simply a case of a pasta lover who has to eat gluten-free finally finding the pasta that makes her excited to eat pasta again!
  2. Many times, after I have a food or use a product, I will schedule a time in the future (maybe a week later) to blog about it on the food blog. This particular pasta I tried just last night for supper and just warmed it up for lunch. I was SO anxious to share the good news that I dropped everything to sit down and tell you all about it.

If you have to eat gluten-free, are cutting back on carbs… OR simply want a more convenient and delicious pasta, I hope you’ll try Caulipower pasta as soon as possible. It’s a perfect 10 out of 10 and, if you’ll excuse me, I think I’ll go have a little more.

Caulipower Pasta

Caulipower Pasta


Filed Under: Gluten Free, Gluten Free Food Reviews, Gluten-Free Recipes, Health Food Reviews, Meal Prep Tips, Pasta Recipes, Quick and Easy Recipes Tagged With: best gluten-free pasta, cauliflower pasta, CauliPower pasta review, meal prep

A Wonderful Gluten-Free and Vegetarian Cookbook: Whole Bowls by Allison Day

May 15, 2019 By Joi Sigers

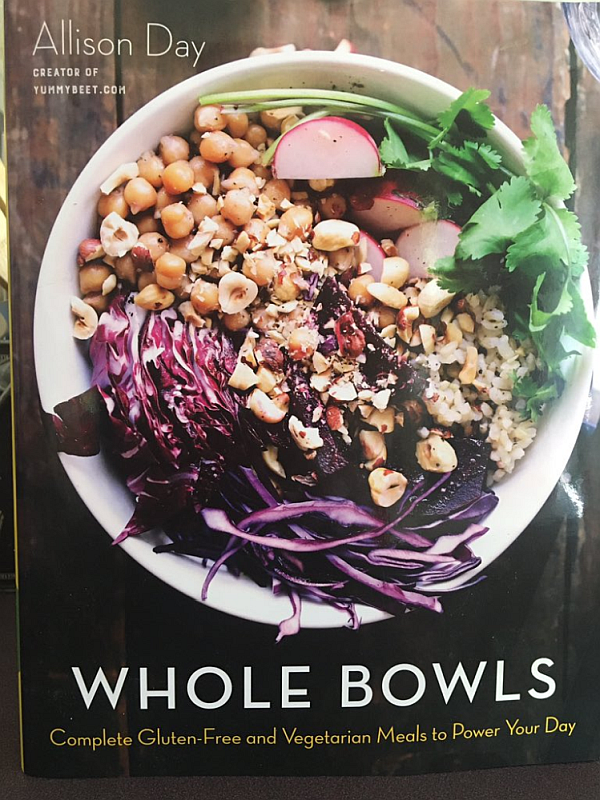
Whole Bowls Cookbook by Allison Day

Whole Bowls Cookbook by Allison Day

When I had to quit eating wheat and gluten (as well as cooking, baking, smelling, and dreaming about them), I had to adopt and adapt. Adopt a new way of eating, cooking, and serving meals and adapt to every single change or be a miserable cuss.

I have no intention of being a miserable cuss… so adapt, I did!

One of my favorite sanity savers and means of serving meals became (and remains) “Bowls.”  Some call them Buddha Bowls and others call them even fancier names. Me.. well I’m a simple gal from Kentucky, so Bowls suits me just fine.

My middle daughter, Brittany (who happens to be a beautiful vegetarian – more about her here!), knew how much Bowls mean to me and gifted me with the gorgeous cookbook you see here, “Whole Bowls: Complete Gluten-Free and Vegetarian Meals to Power Your Day.” This cookbook could not be more up my alley! Not only are there MANY (countless, really) great gluten-free recipes but they’re ALSO vegetarian, meaning I can make them for Brittany to enjoy as well.

Only fair, right? After all, she bought the book!

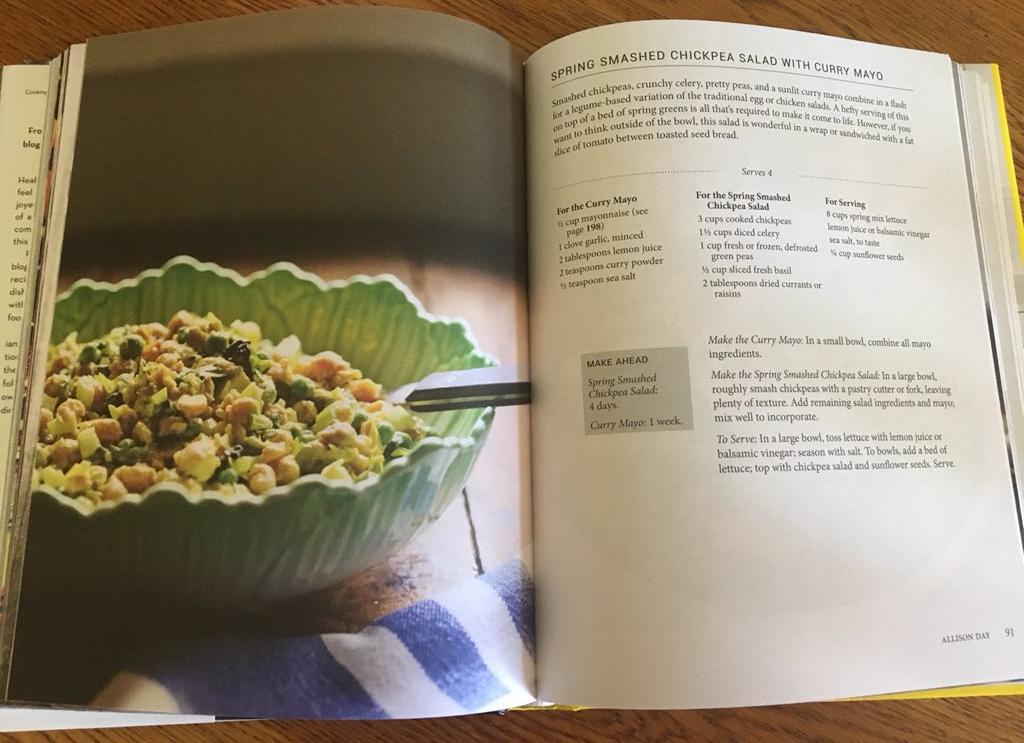
Above, I referred to the recipes in this cookbook as “countless.” Obviously, the actual recipes can be counted – I’ll tell you why I insist on calling them countless! Each and every recipe in Whole Bowls can be tweaked and switched up to your individual tastes. For example, “Loaded Baked Potatoes with Baked Beans and the Works” (page 157), calls for russet potatoes, you can easily use sweet potatoes. If a recipe calls for quinoa, you can use brown rice.. if a recipe calls for white rice, you could use cauliflower rice… and on and on. I would recommend making each recipe exactly as given – but, after that, get creative. It’s your Bowl, after all!

There are also recipes for out of this world sauces that can be incorporated into the bowls they’re recommended for as well as other bowl recipes (whether in or out of this particular cookbook). A few of the sauces are Pumpkin Seed Sauce, Homemade Mayonnaise, Balsamic Glaze, and a Chive Oil (page 109) that is extraordinary on just about anything and everything. In fact, I have a special glass bottle in my Amazon cart I’m buying solely for keeping some of this oil made up and handy.

I love that author Allison Day has made Whole Foods such a gorgeous cookbook (they’re somehow more enjoyable to use, aren’t they?) and that the recipes are completely gluten-free. I also love that they’re basic – deliciously creative, but yet “doable.”

{Continued Below…}

Other AMAZING Recipes Include:

  • Mac and Cheese with Smoked Tofu and Baked Tomatoes
  • Mediterranean Pasta with Arugula, Peas, Yellow Tomatoes, and Feta
  • Roasted Pears with Whipped Goat Cheese and Maple Pine Nut Brittle
  • Hummus
  • Coconut Dreamy Whip
  • Homemade Nut Butter
  • Spring Rice Bowls with Chive Oil
  • Holiday Bowls with Stuffing, Sweet Potato Latkes, Brussels Sprouts, and Balsamic Glaze
  • Greek Mushrooms Stifado with Horseradish Mashed Potatoes
  • Miso Meal in a Bowl
  • Black Beans with Butternut Squash, Black Rice, and Chimichurri
  • Three Bean Garden Salad with Asparagus and Coconut Dressing
  • Curried Falafel with Kale Salad
  • Winter Chopped Salad
  • South of the Border Bowls with Walnut Meat and Grilled Avocado
  • And many, many, many more creative, delicious, and nutritious recipes.

From the Back Cover

“Allison’s first cookbook is fresh and fabulous! I was bowled over by the mouthwatering photos and flavor combinations. The cauliflower hazelnut pilaf alone is worth the price of the book!” —Greta Podleski, bestselling author of Looneyspoons

“Whole Bowls makes healthy food crave-able! It marries the concept of comfort food with healthy eating and shows in the most tantalizing way that the two don’t have to be mutually exclusive.” —Chelsea Allen, RD, creator of Chelsea’s Healthy Kitchen

“All of the best nutrition advice in the world is of little use if you don’t know how to feed yourself well. Allison effortlessly takes one of my favorite things—a comforting bowl of veg and grains—up a whole bunch of notches (hello, hazelnut dukkah!). Whole Bowls will show you just how insanely delicious a plant-centered life can be!” —Desiree Nielsen, RD, author of UnJunk Your Diet

About the Author

Allison Day is a nutritionist and the creator of the award-winning whole foods, vegetarian recipe blog Yummy Beet. She has contributed to various food, health, and news publications such as the New York Times, Prevention, and The Kitchn. Allison grew up in a small, country town—the place where she first developed her love of seasonal, local foods. She resides in southern Hamilton, Ontario, Canada.


Whether you choose to eat gluten-free or the choice has been made for you, you will absolutely love Whole Bowls. For that matter, you’ll love it if you eat gluten with wild abandon! This is just a fun, exciting, and delicious cookbook. I highly recommend it to everyone.

{A few more words about Bowls below the picture…}

Bowl

A few tips I’ve picked up along the path of my relationship with Bowls:

  • If you’ve given up wheat/gluten for health reasons, to cut calories, or because you’re on a particular “diet,” you don’t have to give up flavors because of it. Get creative! Sloppy Joes, for example don’t have to have buns – they can just as easily be served over potatoes (baked, mashed, roasted..) in a bowl with pickles and onions on the side. Same with Pulled Pork or any other “sandwich” you need to deconstruct. Even Egg Rolls can be deconstructed and presented, beautifully, in bowls.
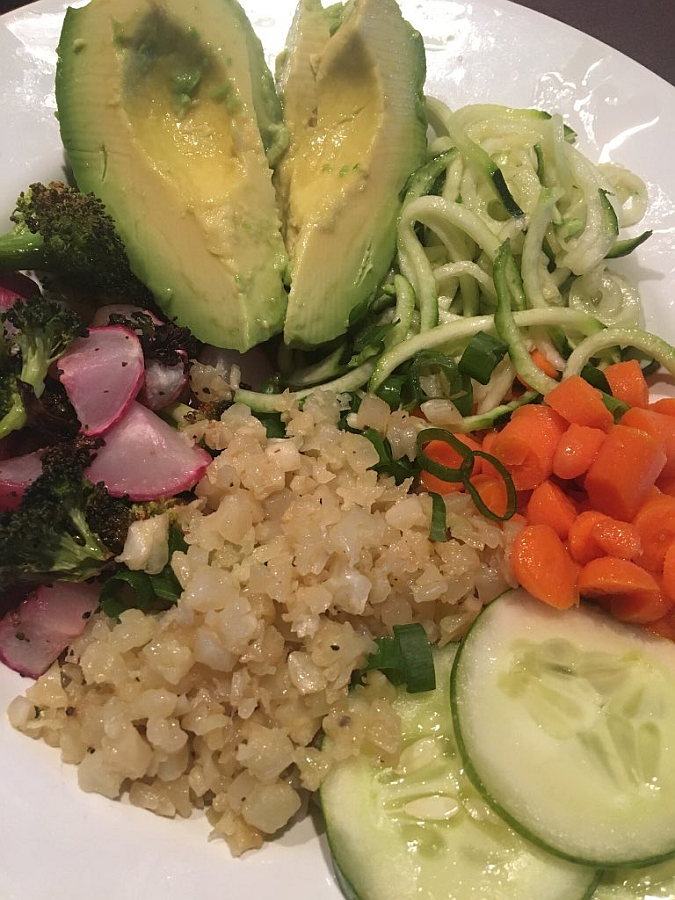
  • We all know how nutritious vegetables are or us. I won’t insult your intelligence or bore you unmercifully by going into their virtues. One of the wonderful things about Bowls is that you can “sneak” beautiful, colorful, and healthy vegetables in to the mix without compromising the taste. I love to keep avocados on hand because they add SO MUCH to bowls. They look great, taste great, and are healthy to boot.
  • Spiralized vegetables aren’t just beautiful in Bowls, they’re also filling and fun to eat. Kids, especially, love different sizes, shapes, and textures.
  • Roasted vegetables are also fun to throw into Bowls – they give a delicious contrast in flavors alongside cooked or raw vegetables and grains.
  • Bowls are IDEAL for those of us who keep and insist on using leftovers. Leftover corn is one of my favorite things to pop into bowls.
  • A “mock” KFC Chicken Bowl technique I love – Put Mashed Potatoes into the bowl(s), top with cooked yellow corn, chicken (omit if you choose), and brown gravy. I love to make and add a little vinegar coleslaw to the side, too. It’s outrageously good.
  • When buying bowls for… well… Bowls… look for wide-open bowls, usually called pasta or salad bowls.  Bowls can make a gorgeous presentation – I like to use white bowls, often, but have also fallen in love with colorful ones.
  • Bowls are ideal for breakfast, lunch, and supper. Breakfast bowls are another favorite. Potatoes, bacon or sausage, eggs, broccoli, and cauliflower bowls make a breakfast that’s worth getting out of bed early for even on a Saturday.
  • Once you go down the Bowls rabbit hole, you’ll wonder what took you so long! Again, Whole Bowls is a wonderful source for inspiration and countless ideas.


Filed Under: Christmas Gift Guide, Cookbook Reviews, Gift Ideas for Cooks, Gluten-Free Recipes, Vegetarian Dishes Tagged With: Bowl recipes, Gluten Free cookbook review, vegetarian cookbook review

Easy Gluten-Free Lasagna with Explore Cuisine Green Lentil (No Boil!) Noodles

September 6, 2017 By Joi Sigers

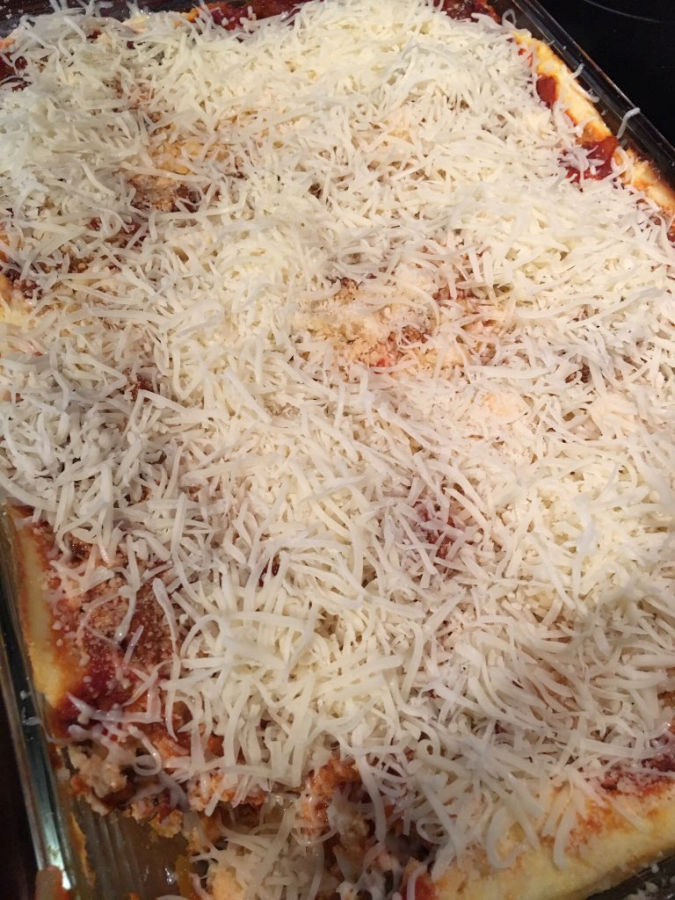
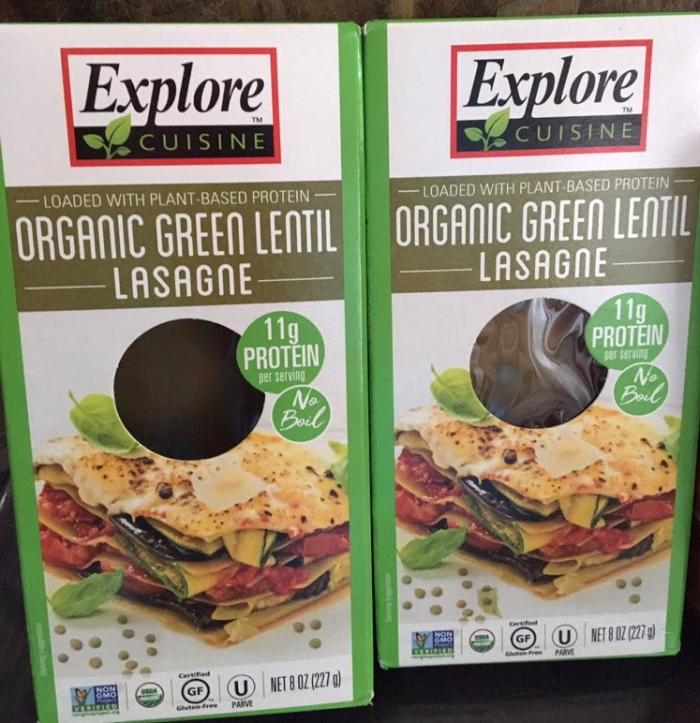
Gluten-Free Lasagna with Explore Cuisine Green Lentil Lasagna Noodles

Gluten-Free Lasagna with Explore Cuisine Organic Green Lentil Noodles

Gluten-free lasagna just got easier and healthier – and if you love lasagna like Garfield the cat and I do, this is the kind of good news you’ve been waiting for.

Explore Cuisine makes a wonderful line of gluten-free pastas that will change your entire pasta game. They’re delicious – dare I say far more delicious than they sound like they’d be. I mean, let’s be serious, even those of us who love vegetables to distraction would be a little skeptical about Green Lentil Lasagna Noodles. I know I was! When I first used them to make lasagna, I was half-tempted to make one with traditional gluten-free noodles too, you know… just – in – case.

I didn’t take this crazy precautionary step and it turns out I didn’t need to. These noodles have a really wonderful, understated flavor that couldn’t work more beautifully with tomato sauces if it had to.

Not only are these noodles gluten-free and delicious, they don’t have to be boiled before building your lasagna. I am so over the process of handling limp HOT lasagna noodles, so that’s a dream come true for me and my hands.

{Continued Below…}

Explore Cuisine Green Lentil Lasagna

Explore Cuisine Organic Green Lentil Lasagna on Amazon
About Explore Cuisine:

Explore Cuisine products are vegan, organic, gluten-free, and kosher, ensuring your health and igniting your taste buds! For example, our delicious bean pastas contain nearly 20-25 grams of protein per serving and are low in carbs and sodium while simultaneously containing a high fiber content. With Explore Cuisine, you’ll experience the incomparable taste of pasta with all the benefits of nutritious beans! Read More…

There is a wonderful recipe for Vegetable Lasagna on Explore Cuisine’s blog – just click the link to check it out. It’s out of this world – fresh and delicious.

The first lasagna I made with these noodles was, however, my “go to” lasagna I’ve been making for 112 years. The recipe is below and, thanks to these no-boil noodles, it couldn’t be easier.

A Few Notes:

  • If you use a pasta sauce that already contains garlic – leave the garlic out of the recipe. The same is true of one with bell peppers, or onions.
  • You can add a small (drained) can of sliced mushrooms in with the onion and bell pepper.
  • I like my lasagna extra saucy, but if you prefer your lasagna a little more “traditional,” only use one jar of pasta sauce instead of 1-1/2.
  • Always check pasta sauce for the gluten-free label. Some actually are not gluten-free. Always, always check.


Filed Under: Gluten Free, Gluten Free Food Reviews, Gluten-Free Recipes, Pasta Recipes Tagged With: gluten-free food reviews, gluten-free lasagna recipe

Fast & Easy Summer Meal: Meatless Tostadas

July 12, 2017 By Joi Sigers

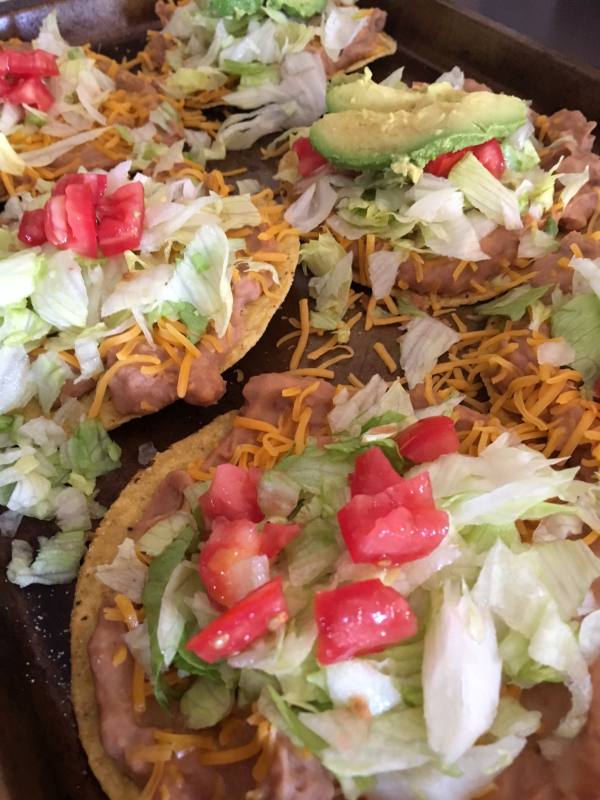
Tostadas with Refried Beans and Tomatoes

Given the fact that I have a food blog and talk about food without even taking a breath, you probably already know that I love to cook. In fact, I enjoy it so much that I stare in blank amazement when people say they don’t enjoy cooking.

Having said that, on the hottest days (and nights) of summer, I appreciate a quick, easy, and no oven required meal. These tostadas are so quick and easy to pull together and there are endless options to “make them your own.” They’re also great for eating on a budget – especially if you make them meatless.

The Toppings Are Your Call:
  • Refried Beans or Ground Beef w/Taco Seasoning
  • Cilantro
  • Shredded Cheddar
  • Mexican Crumbling Cheese
  • Green Onions
  • Shallots
  • Shredded Lettuce
  • Jalapeno Peppers
  • Chiles
  • Tomatoes
  • Pico de Gallo
  • Sour Cream
  • Salsa
  • Salsa Verde
  • Black Olives
  • Lime Juice
  • Roasted Corn
  • Roasted Red Peppers
  • Etc…

The NON-Recipe for Refried Beans Tostadas

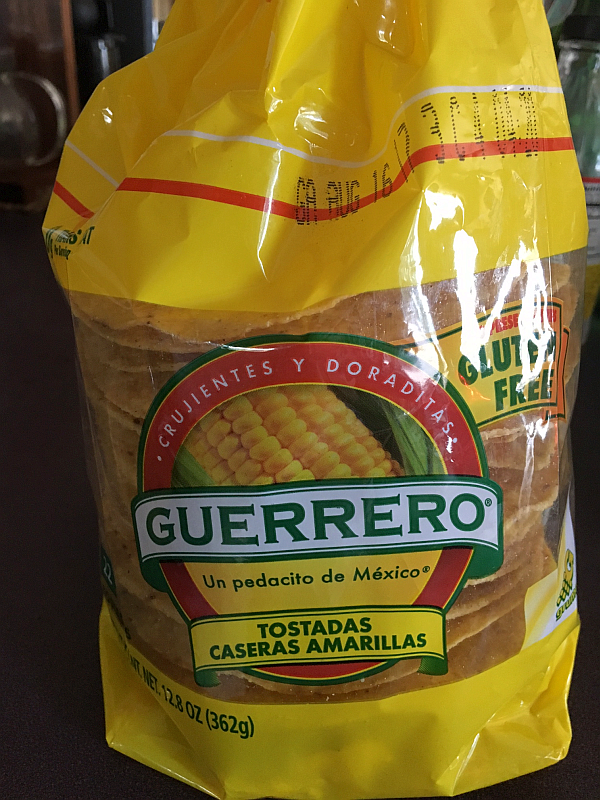
Guerrero Tostadas

There’s No Need to Even Heat These Tostadas

It all starts with the base: the Tostada shells.  I love the Guerrero Tostadas pictured above. They’re delicious and ridiculously inexpensive. That’s a combination I don’t take lightly.

Line a baking sheet (or several) with the number of tostadas you’ll be serving. There’s no need to heat the shells at all for tostadas.

Refried Beans: I use canned refried beans and am pretty darn brand-loyal. I buy Old El Paso Traditional Refried Beans almost exclusively. For 10 tostadas, I used two cans. Now you can use refried beans straight from the can for this recipe or to serve as is.  However, I love to add a little water (couple of tablespoons) to the beans when I first add them to the skillet, along with about 1/2 tsp of cumin and a splash of hot sauce. In full disclosure, I add cumin to more things than not. In this particular dish, I also added 1/2 cup of sour cream to the beans. It makes them creamier and dreamier.

Cook the beans on low, stirring frequently. Season with a little salt.

Tostadas with Refried Beans and Tomatoes

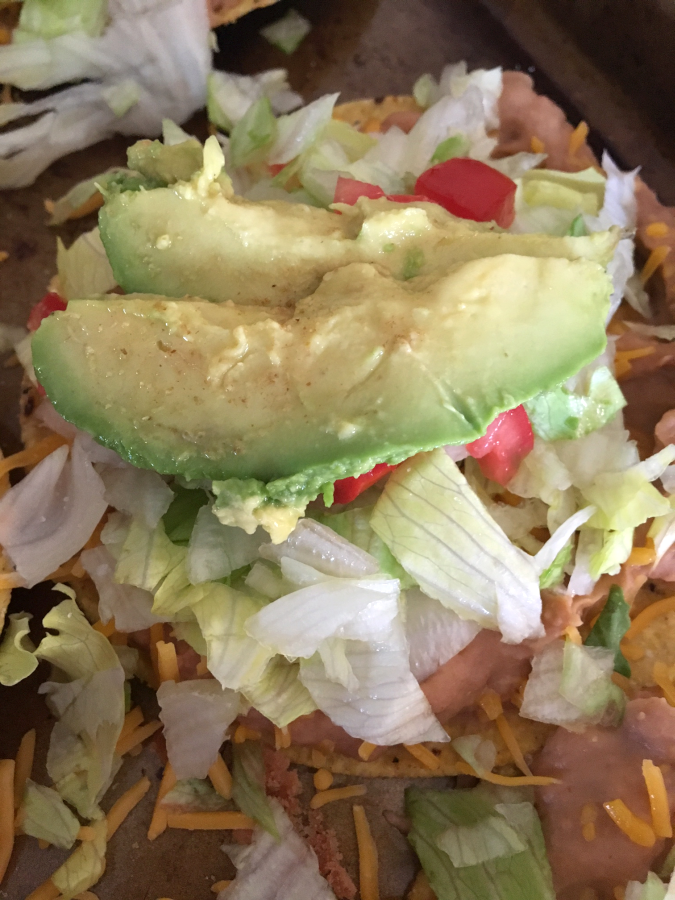
Make Some with Avocado and Some Without: Just In Case Someone Isn’t a Fan

When the beans are nice and hot, plop them evenly among the tostada shells, spreading them to the edges. Top the hot beans with shredded cheddar cheese so it’ll melt irresistibly into them.

Now this is where you can really get cute. Add whatever floats your boat at this point. Cilantro, shredded lettuce, tomatoes, black olives, scallions, shallots… you do you!

I add different toppings just about every time I make tostadas but the cast of characters almost always includes cilantro, shredded lettuce, tomatoes, sour cream, cheese, and avocado.

You’ll want to put the sour cream on top, if for no other reason than it looks cool. Finally, the thing that really seals the deal? Squeeze a little lime juice over the whole shebang.

I’m not sure why, exactly, but lime juice simply makes every single Mexican dish you can think of even better.


Avocado on Tostadas

Ideas for Side Dishes:

  • Rice
  • Tossed Salad
  • Chips and Salsa
  • Corn
  • Fried Potatoes


Filed Under: Cooking on a Budget, Gluten-Free Recipes, Quick and Easy Recipes, Summertime Favorites Tagged With: Gluten-Free Tostadas, meatless meal ideas, Refried Bean Tostadas

Gluten Free Cranberry Pecan Cookies

November 23, 2016 By Joi Sigers

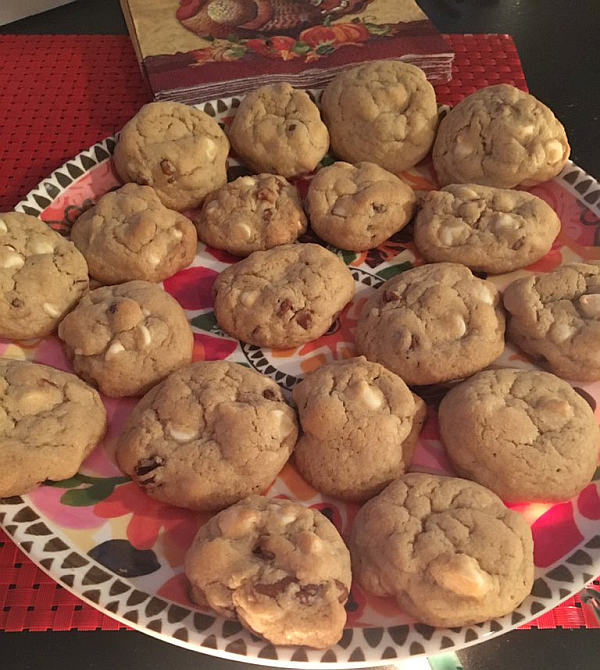
Gluten-Free White Chocolate and Pecan Cookies
Gluten Free White Chocolate Chip and Pecans Cookies
Before getting to the two gluten free cookie recipes, I just want to express my yuuuge gratitude to food companies who keep churning out exceptional gluten free products. Krusteaz, Udi’s, Glutino, Pamela’s CedarLane, Pillsbury, Betty Crocker, Amy’s… the list goes on and deliciously on. I am so very thankful for them – and I plan to keep letting them know – all over social media, through e-mail, here on the food blog… anywhere and everywhere I have an opportunity to sincerely thank them, I’m going to take it. I’d love to see everyone in the gluten free (for health reasons, especially) community do so. We don’t hesitate to point out when a company or restaurant drops the ball – we should be even faster with gratitude.

Seems fair, right?

Okay… off the soap box! One of the companies I am most thankful for is Krusteaz. Their products are first rate – as in perfect every single time – and they are SO affordable. Let’s face it, not all gluten free products can be called “reasonably priced” let alone “So affordable,” but Krusteaz (and Pillsbury, for that matter) are as fair as it gets.

I just made a couple of batches of cookies using Krusteaz Gluten Free All Purpose Flour. I tweaked their wonderful Choclate Chunk Cookies recipe (below).  In place of the 1-1/2 chocolate chips or chunks, I made the following cookies with the following SIMPLE alterations. The first (with dried cranberries) was made for my youngest daughter who cannot eat chocolate (poor baby!). She loves cranberries like crazy, so I thought this would be ideal.

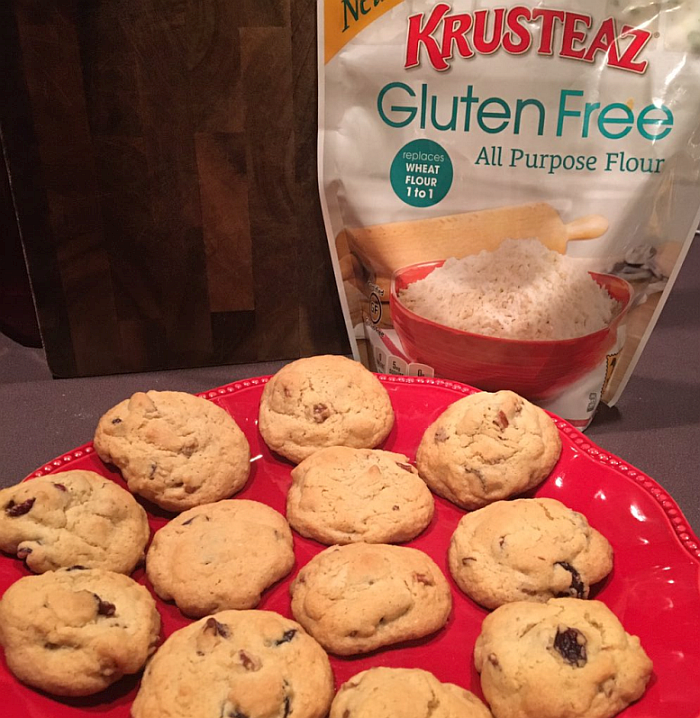
  • Cranberry Pecan Gluten Free Cookies – (pictured below) instead of the 1-1/2 chocolate chips or chunks, I added 3/4 dried cranberries and 3/4 coarsely-chopped pecans.
  • White Chocolate Chip Pecan Gluten Free Cookies – (pictured at the top) again, 3/4 cup white chocolate chips and 3/4 cup coarsely-chopped pecans (yes.. as a matter of fact, I am obsessed with pecans)

Below is Krusteaz’s Chocolate Chunk Cookies recipe (it’s perfection, by the way). It’s the easiest chocolate chip cookie recipe you’ll ever find – you don’t even need a mixer. Tweak as I did (above) or go with the orgiinal (below). Either way, you’re going to be blown away.

Krusteaz Gluten Free Chocolate Chunk Cookies

1 ¼ cups Krusteaz Gluten Free All Purpose Flour
¼ cup butter, softened
¾ cup sugar
¾ cup packed brown sugar
1 teaspoon baking soda
1 teaspoon salt
1 ½ cups chocolate chips or chunks
2 eggs
1 cup (2 sticks) butter, softened
1 teaspoon vanilla extract

Preheat oven to 350°F.

Stir together flour with remaining dry ingredients. Add eggs, butter and vanilla and blend until dough forms, kneading by hand if necessary. Scoop rounded 2 tablespoon portions of dough and place 2 inches apart on ungreased cookie sheet. Flatten slightly.

Bake 10-11 minutes or until light golden brown on the edges. Cool 5 minutes before removing from pan. – Recipe from Krusteaz

Gluten-Free Cranberry and Pecan Cookies
Gluten Free Cranberry and Pecans Cookies

Filed Under: Christmas Recipes, Cookies, Gluten-Free Recipes, Oh, Nuts! Tagged With: cookie recipes, gluten free cookie recipes, gluten free cookies for Christmas, gluten free cookies for Thanksgiving, pecan recipes

Gluten Free Pecan Sandies Recipe

December 31, 2015 By Joi Sigers

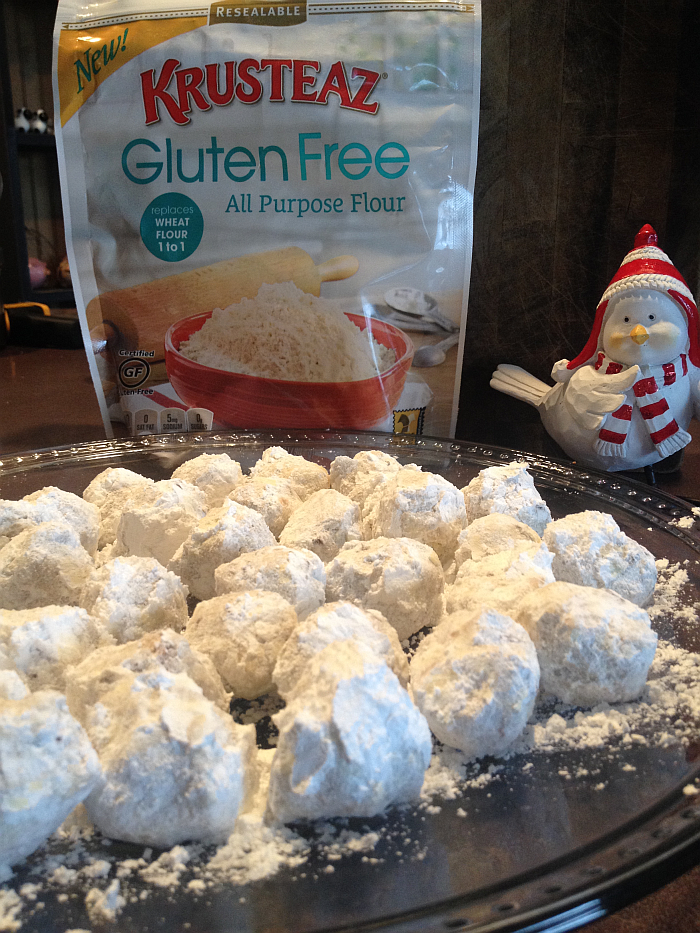
Gluten Free Pecan Sandies

Gluten Free Pecan Sandies

When it comes to Christmas cookies… or any cookies, for that matter… one of my absolute favorites is Pecan Sandies (sometimes called Mexican Wedding Cookies). My favorite cookies are usually “nutty” and always extra-sweet and these cookies more than fit the bill.

When I had to give up gluten/wheat (my body’s decision, not my mind’s), I was pretty sure the days of being a cookie monster were behind me. Fortunately a lot of food companies have been busting their rears perfecting All Purpose Gluten Free flours and have, as a result, opened up a whole new world to the gluten free crowd that we once thought was closed for good.

Granted, some of these “1 to 1” all purpose gluten free flours can be pretty expensive, but the one I recently discovered is, shockingly, just a bit more than regular flour. The fact that I’ve used it in A LOT of old favorite recipes as a substitute for traditional flour with spectacular results just blows me away.

Krusteaz Gluten Free All Purpose Flour is a a dream come true for this gluten free cookie monster and the fact that it’s also affordable is even sweeter.

I used my favorite Pecan Sandies recipe, from my favorite cookies cookbook, Better Homes and Gardens Cookies for Christmas, 1985. You should see this cookbook! I’ve used it so much over the years (throughout the year, like any self-respecting cookie monster would) that the pages are discolored, stained with who-knows-what and filled with notes like…

  • Brittany’s favorite cookie!
  • Emily loves these so much, they’re worth the extra effort..
  • Michael’s fave..
  • Stephany can’t get enough of these…

It’s pretty easy to tell my favorite cookbooks from the rest.

Below is the recipe, as it appears in the cookbook EXCEPT that I replaced “all purpose flour” with Krusteaz Gluten Free All Purpose Flour. If you have another gluten free all purpose flour you’d like to use, by all means, give it a try! I personally haven’t tried other gluten free flours so I can’t promise they’ll be as great as these were.

Needless to say, if you don’t have to eat gluten free, simply switch out the gluten free all purpose flour for the traditional one.  Either way, you’ll have a cookie that’s as delicious as it is pretty.


Filed Under: Christmas Baking, Cookies, Gluten Free, Gluten-Free Recipes Tagged With: gluten free Christmas cookie recipes, gluten free cookie recipes, gluten free cookies, gluten free pecan sandies recipe, Krusteaz gluten free all purpose flour

Gluten Free Strombolis With Bob’s Red Mill Gluten Free Pizza Crust Mix

September 15, 2015 By Joi Sigers

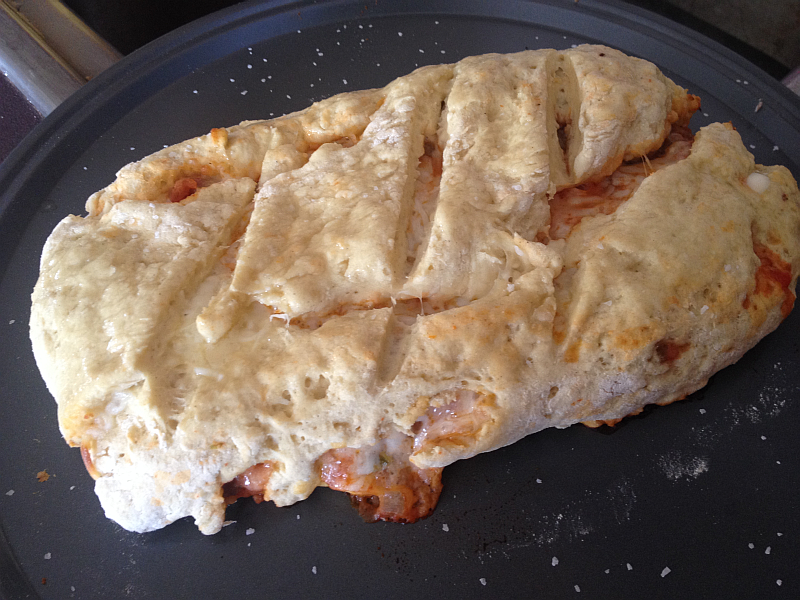
Gluten Free Stromboli

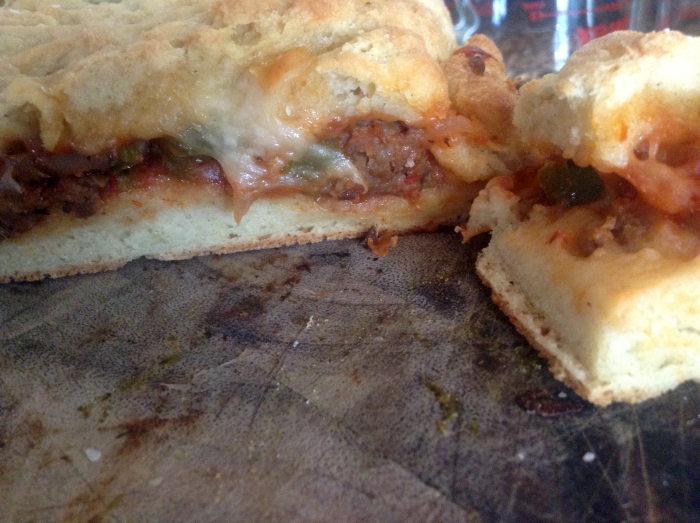
Gluten Free Stromboli (Delicious!)


Gluten Free Strombolis Recipe

1/2 lb Sweet Italian Sausage
1 Green Pepper, chopped
1 Sweet Onion, chopped
1 TBS minced garlic from a jar (optional)
Jar of Spaghetti Sauce (Meat Free)
1 Bay Leaf
Kosher Salt
4 Cups Mozzarella
Pizza Crust (see below)
Black Pepper

Pizza Crust: For these, I used one bag of Bob’s Red Mill Gluten Free Pizza Crust Mix (makes two strombolis).  Follow the directions for pizza crust on the back of the bag. When it comes time to roll out the crusts, remember you want it pretty thin. Another tip, roll it out on parchment paper, then use it to “assist” you in rolling the stromboli up.

To make it even easier, you could use Pillsbury’s Ready Made Gluten Free Pizza Crust. IF you can find it. I have trouble finding it in most grocery stores anymore.

  1. Pre-Heat oven to 400 degrees.
  2. Brown the Italian Sausage. If you’d prefer Hot Italian Sausage, use it instead. After making these with the Sweet, I couldn’t help thinking that a mixture of sweet and hot would’ve been delicious.
  3. Add the chopped peppers and onions to the sausage as it browns. Drain and return all to the pan.
  4. If you’re adding garlic, do so now. Feel free to add more or less – depending upon your own level of garlic love.
  5. Salt and pepper everything.
  6. Add half the jar of sauce – save the rest for dipping your Strombolis.

Gluten Free Stromboli

Gluten Free Stromboli

For the Crust:

  • Roll each ball of pizza dough into a 10-by-16-inch rectangle.  Carefully transfer to a baking sheet.
  • Divide the Italian sausage filling down the middle of each rectangle. Sprinkle 2 cups of mozzarella evenly on top of each filling.
  • Turn the pan horizontally, so you’re looking at the future strombolis lenghtwise. Starting at the bottom of each, carefully roll the dough on top of the filling about an inch to two inches. Roll in the two sides.  Now roll “up” from the bottom (here’s where the parchment paper is a lot of help) and seal the edges – position the stroms with the seam on the bottom.  Cut several diagonal slits into the crust (with a ridiculously sharp knife), if you’re feeling fancy.
  • Bake for 15-20 minutes.

Bob’s Red Mill Pizza Crust Mix
Optional Add Ins and “Hindsight” Ideas:

  • Pepperoni Slices would be delicious in these strombolis. One bite it, it occurred to me! Why it didn’t occur to me while I was at the store is beyond me.
  • You could easily make vegetarian strombolis by replacing the meat with extra peppers, mushrooms, and even jalapenos.
  • Instead of using the spaghetti sauce method, even though it was delicious, the next time I make these I want to try this approach: Brown the sausage/drain. Saute onions and green pepper. After rolling out the pizza crust, “brush” on my favorite pizza sauce (which happens to be Classico), evenly spread the filling ingredients down the middle, add the cheese, roll up, and bake. Like I said, the spaghetti sauce is fantastic, but I think pizza sauce would be pretty amazing too.
  • The stroms shown here are my first attempt and I, obviously, didn’t go too heavy on the filling. I wanted to make sure my dough closed around the ingredients and didn’t bust at the seams. Use common sense when putting your stroms together – it’s honestly better to go “light” than to have them pop open in the oven.
  • Strombolis don’t have to have to include the traditional ingredients. These would also be delicious with cheddar cheese, onions, and ham. I guess just about any luncheon meat would be delicious. Hmmm, I think I’ll try sliced roast beef and Swiss cheese sometime…
  • When it comes to favorite gluten free mixes (such as Bob’s Red Mill Gluten Free Pizza Crust and Bob’s Red Mill Gluten Free Pie Crust Mix), I order in bulk off of Amazon. I’m afraid I can’t always count on my grocery store to have just the mix or mixes I need, but I can always count on Amazon. Come to think of it, it’s time to order another box of each of these mixes.
  • Store-bought pizza dough (whether you go the gluten free route or not) would be easier to work with, but when you make your own, the taste is just out of this world. They may not be quite as photogenic as a store bought crust would be, but since when do photos taste good?!
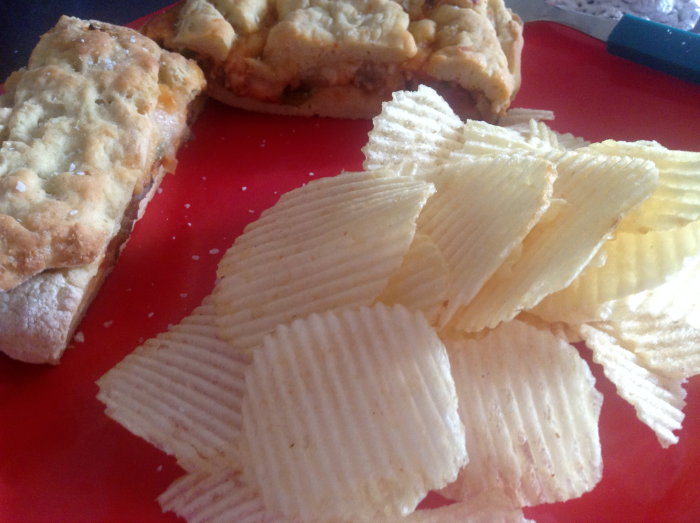
  • When I served the stroms, I sliced and positioned them on the plate among plenty of Ruffles Potato Chips (you just cannot have stroms without Ruffles!). I served little bowls of Marinara Sauce for dipping, but pizza sauce would also be great. Add a dill pickle and you’re golden.
  • Bob’s Red Mill Gluten Free Pizza Crust is a 10 out of 10. Excellent in every single way and it has never let me down. I highly recommend it for pizzas and strombolis.

Gluten Free Stromboli

Strombolis without Ruffles? I Don’t Think So!

Filed Under: Gluten Free, Gluten-Free Recipes, Paninis and Sandwiches, Pizza Recipes Tagged With: gluten free recipe, gluten free recipes, gluten free stromboli recipe, gluten free strombolis

Grilled Cheeseburger Pizza

July 13, 2015 By Joi Sigers

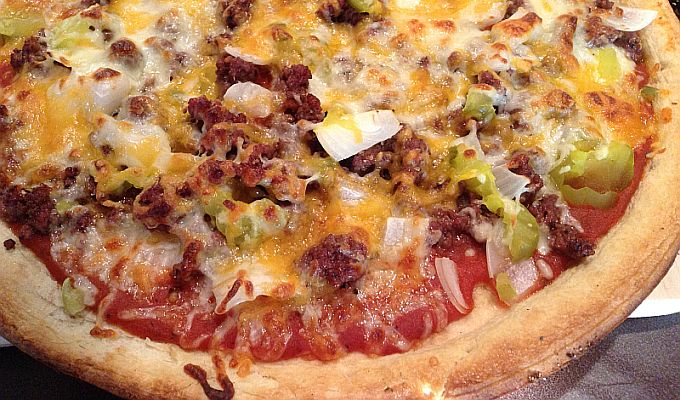
Grilled Cheeseburger Pizza

Grilled Cheeseburger Pizza

Before we get to the recipe, a few words about grilling pizzas. My husband has always been a huge fan of grilling. Hamburgers, hot dogs, chicken, corn on the cob… you name it,  he’s grilled it…. and to perfection.  Last summer, however, I thought he’d finally lost his mind. Seriously, I thought it was time to phone the children.

He told me that he had special plans for his weekend grilling. As my mind was rounding up ideas for sides for burgers, steaks, or chicken – he said he wanted to grill a couple of pizzas.

I’m always up for an adventure that doesn’t involve snakes, heights, or dressing in horizontals, so I told him I was on board.

Here’s the thing, in spite of my initial doubts, I soon found that grilled pizza is out of this world delicious.  Out. Of. This. World. It gives a certain, unmistakable flavor to pizza that’s like a brick-oven pizza you’d pay an arm and a leg for.   If you’ve ever had a brick oven pizza, you know they’re more delicious than any pizza has a right to be.

Grilled pizzas recreate the flavor – for a lot less money. AND without heating up your kitchen.

Note: Be sure to read the article in its entirety – it continues after each picture until the end, and I’ll let you know when that is. Deal? Deal.

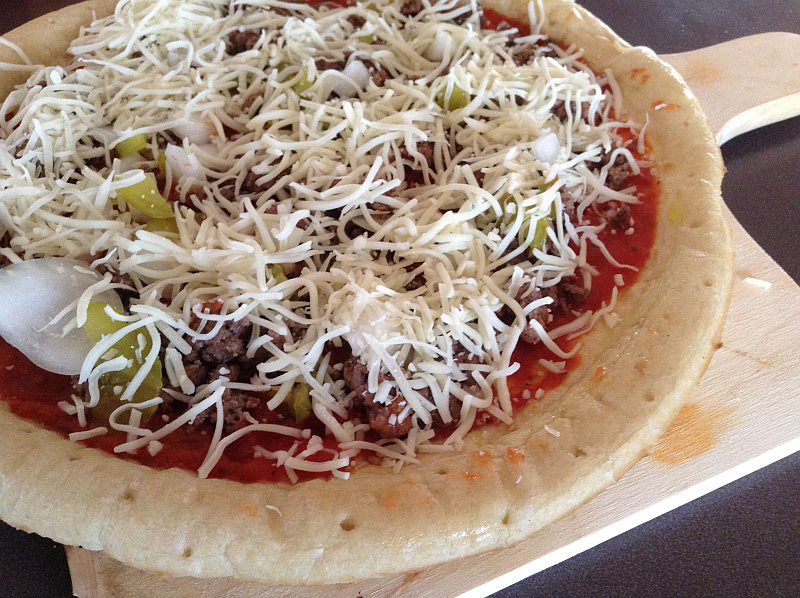
Pizza Crust with Classico Sauce

Pizza Topped with Classico Sauce and Mozzarella

Your Pizza Crust

If you don’t eat gluten free, choose any crust you want: make your own, buy a mix, or even use a pre-made crust. If you eat gluten free, I (personally) suggest using one of these two gluten free mixes:

  • Bob’s Red Mill Gluten Free Crust Mix
  • Glutino Gluten Free Pantry Pizza Crust Mix

I’ve heard great things about Pamela’s Products Gluten Free Pizza Crust Mix but haven’t tried it, myself, yet. When I do, I’ll let you know.

When making a grilled pizza, there is nothing in the whole world wrong with buying a ready-made crust. In fact, they’re nice and firm and you can pretty much bet that they’re up to the challenge. Besides, the flavor from the grill and your toppings are the true stars of the show.

Your Pizza Sauce

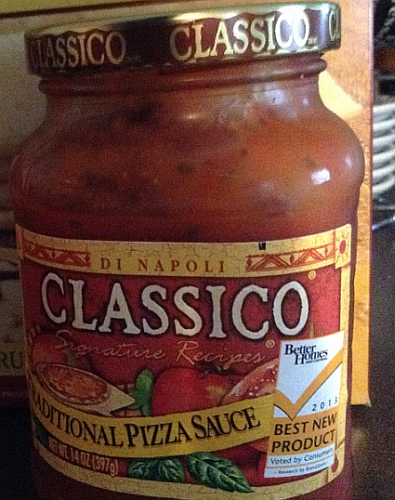
When it comes to pizza sauce, different strokes for different folks. Some use tomato sauce, straight from a can, and swear there’s no other way to do it. Others grab a can or jar of whatever pizza sauce is on sale.  As for me, Classico Traditional Pizza Sauce is the only one I ever buy or use.

I once had a little taste test challenge and it blew the rest away. The flavors in Classico make the so-called flavors in the rest seem non-existent. It’s also thicker. And prettier.

Let’s Get Grilling!

1. Prepare your pizza crust:

After your crust has been mixed, work it with your hands to form a large circle OR several small circles or even rectangles. Place dough onto a lightly-floured, unbleached parchment paper-lined pizza pan.  Needless to say, if you’re gluten free, be sure to use gluten free flour or (my personal favorite) gluten free cornmeal. You can also use aluminum foil in place of the parchment paper, but parchment paper seems less inclined to tear.

2. Have your sauce, toppings, and cheese ready:

Whether you’re making a good old-fashioned cheese or pepperoni pizza or you’re getting fancy with grilled veggies or a Cheeseburger Pizza (See Below), have everything ready to go. DO NOT expect the crust to wait on the grill for you while you round everything up – he will burn faster than you can think of a Plan B.  Have everything ready within arm’s reach.

When putting sauce on your dough, think of it as “painting” the crust as opposed to slopping sauce all over it. Too much sauce on the pizza isn’t a good thing.

Your Grill

Gas Grills: Set grill to 400 degrees F

  • Pre-heat grill with lid closed for about 10 minutes.
  • Use an  oven thermometer to make sure that the grill temperature is at a minimum of 400 degrees F.
  • When grill is at the proper pre-heated temperature, carefully grease the grates with olive oil. Simply wet paper towels with the olive oil, and use tongs to “grease” the grates. There are also cooking sprays made especially for grilling too.
  • Peel the parchment paper off and place your pizza dough directly onto the grill. This is where it’s especially cool to have a pizza peel – you can just slide your dough onto the grill in style.
  • Cover and cook your crust for 3 minutes (until bottom is crisp). Turn crust over and QUICKLY top with your sauce, toppings, and cheese.
  • Cover and grill two more minutes.  Remove your delicacy from the heat by sliding pizza onto a pizza peel or cutting board.
  • Allow the pizza to rest for a few minutes, then slice and enjoy.

* I’m not familiar with grilling pizzas on charcoal grills – but you can find information online. Simply ask Google – he knows everything. 

Cheeseburger Pizza!

You can use cheeseburger pizza toppings for a grilled OR oven baked pizza, but (at the risk of sounding like a broken record), the brick-oven effect from a grill is extra, extra special.

Brown 1 lb ground chuck with 1/2 an onion. Salt and pepper the production. After the meat has browned, remove from pan and drain.

Coarsely chop 8-12 dill pickle chips (the number depends on how much you love pickles – I went with 8 the first time and have since moved up to 12).  You could, of course, use pickle relish or finely chop the pickles – but, for whatever reasons, I always take the “rustic” or “coarsely chopped” side.

As for cheese, I use a combination of  shredded mozzarella and shredded cheddar cheese for Cheeseburger Pizzas. I’ve seen some people just use cheddar, but I couldn’t do that to mozzarella.

Not after everything we’ve been through.

As you can tell from the picture at the top, I didn’t do it, but you could add chopped fresh lettuce and shopped tomatoes to the top right before serving.

If you’re ready to completely blow your mind…. why not make a Grilled Bacon Cheeseburger Pizza by simply topping with crumbled bacon before (or even after) grilling?

* thud*  I just passed out from the thought.

KinniKinnick Pizzas

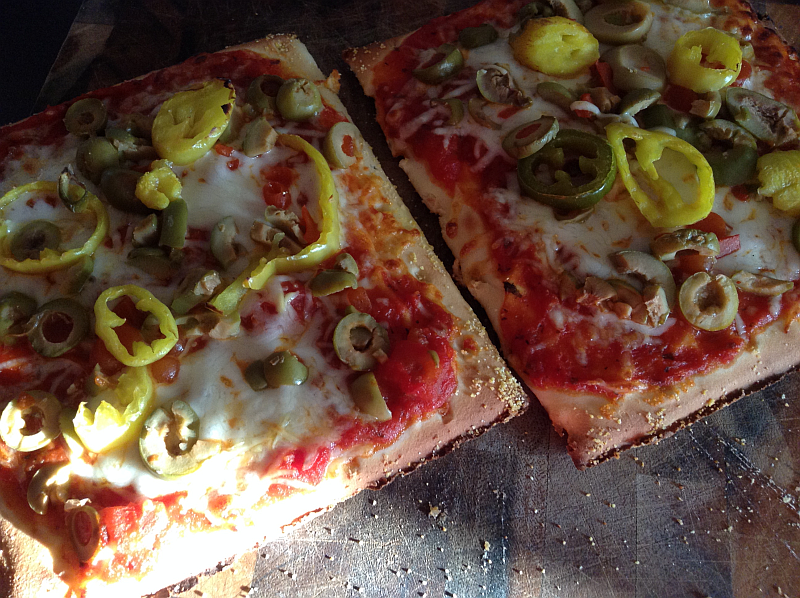
Kinnikinnick Pizzas Topped with Classico, Jalapenos, Olives, and Banana Peppers

Taco Pizza on the Grill

Before I had to start eating gluten free, taco pizza was a huge obsession.

Guess what. It still is.

You can build a taco pizza by simply changing a few things up with the Cheeseburger Pizza – and, again, this can be done in the oven or on the grill. After your ground beef or chuck has browned, add taco seasoning (McCormick has a gluten free taco seasoning mix… good on them!) and a little water, just as if you were making tacos. Add black olives, jalapenos, black beans, cheddar cheese, whatever toppings your little heart desires.

Before serving, top with chopped lettuce and tomatoes. Serve with sour cream and/or mild sauce, salsa, or Picante sauce. A little sour cream and mild sauce drizzled over the top of each slice…. HEAVEN!

Frozen Pizza on the Grill

This is where things really get quick and easy! You can grill frozen pizzas and get that same brick oven flavor. Simply place the pizza onto the grill, cover, and cook for about 10 minutes (for traditional-size frozen pizzas).  Lift the cover of the grill, rotate the pizza 1/2 turn, close the lid, and cook for about 10 more minutes.

Please keep an eye on the pizza the whole time. Gluten free frozen pizzas are almost always smaller than regular pizzas, so they will cook faster. Use the 10 minutes as a guide, not a hard and fast rule.

Use a food thermometer when you think your pizza is ready – you want the internal temperature to be at 160 degrees.

My Beloved Kinnikinnick Gluten Free Pizza Crusts are AMAZING on the grill. Seriously, the flavor can’t even be described. Even non-gluten free eating pizza lovers will be hooked for life.

A Couple of Notes:

  • After the first two minutes, check the bottom of your crust. If it isn’t browning equally across the surface, use a spatula and rotate the crust 90 degrees.
  • It’s very (make that VERY) tempting to go overboard with sauce and toppings when it comes to pizza. However, try to reign yourself in. Too much sauce and extra-heavy toppings do nothing to add to the flavor of a grilled pizza. In fact, they’ll just weigh it down and detract from the awesome grilled flavor. Use a very modest layer of sauce across your dough and store the leftovers in the refrigerator for next time.
  • Classico.

Classico Pizza Sauce

Filed Under: Gluten Free, Gluten-Free Recipes, Grilling, Pizza Recipes Tagged With: grilled gluten free pizza, grilled pizza

White Chocolate Chip Rice Muffins Recipe

July 6, 2015 By Joi Sigers

White Chocolate Chip Rice Muffins
 

White Chocolate Chip Muffins

2 cups Bob’s Red Mill White Rice Flour
2 Eggs
1 cup Vanilla Almond Milk
4 Tbsp. Sugar in the Raw
4 Tbsp. Canola Oil
4 tsp. Baking Powder
1 tsp. Salt
4 Tablespoons White Chocolate Chips

Combine all the ingredients (except the chips) in a mixing bowl and blend with an electric mixer until everything has combined and is getting along nicely.

Stir in the white chocolate chips.  Fill your paper-lined muffin tin cups or the cups, themselves.  After I’ve filled each of the 12 cups, I like to go back and add a few extra chips toward the top of  the muffins.  The exposed chips on top have so much unbelievable extra flavor. My mouth waters just thinking about them.

Bake at 425° for 17 to 20 minutes.

Yield: 12 Muffins (can be halved)

Special Note: These particular muffins are not “extra moist” muffins. They are, however, beyond Heavenly with a glass of milk, cup of coffee or hot chocolate!

Optional Sugar Glaze

The last time I made these rice muffins, I topped them with a sugar glaze which made them closer to a dessert than anything else. Not surprisingly, I was totally okay with that…

  • 1 1/2 cups confectioners’ sugar, sifted
  • 3 – 4 tablespoons milk
  • 1 teaspoons vanilla extract

Slowly add the milk and vanilla extract to the sifted powdered sugar until you have a shiny glaze.

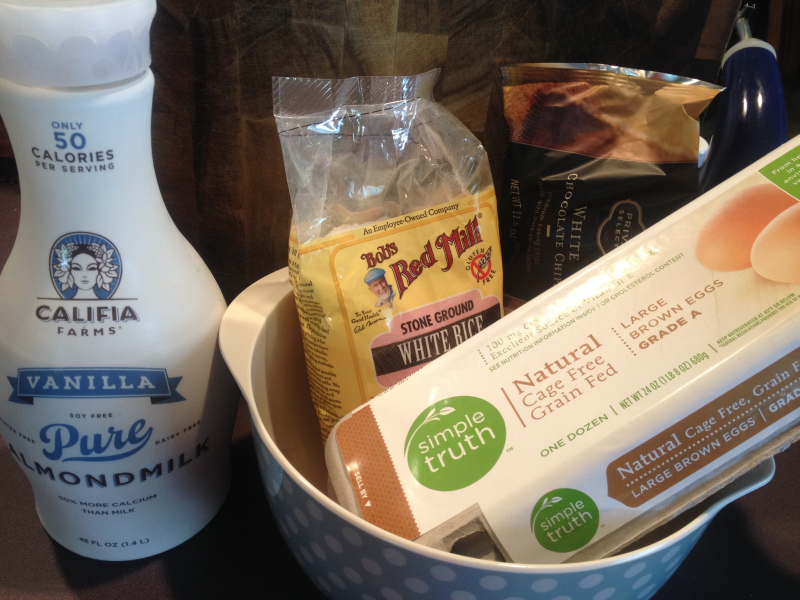
White Chocolate Chip Rice Muffins Ingredients

Filed Under: Bread, Breakfast and Brunch, Gluten Free, Gluten-Free Recipes Tagged With: gluten free bread, gluten free muffin recipe, gluten free muffins

Next Page »

Primary Sidebar

Welcome to the Get Cooking Food Blog

My name is Joi (“Joy”) and Get Cooking is where I celebrate some of my greatest passions: Recipes, kitchen gadgets, gluten free food reviews, gluten free recipes, pig collectibles, chocolate, cookbooks, and coffee.

Lots of coffee…

  • Email
  • Instagram
  • Twitter

What’s New on the Food Blog?

  • Brilliant Organizer for Cans and Other Pantry Items… Even Dishes
  • Disposable Air Fryer Liners: Perfect for Fast Cleanups!
  • Vegan and Gluten-Free Salad Dressings, Mayo & Butter from Plant Perfect (Exciting New Products!)
  • Goodful Non-Stick All-In-One Pot: It Has all the Good and None of the Bad (Seriously, I Love This One!)
  • Torani Strawberry Flavored Syrup Makes VERY Memorable Tea, Matcha, Milkshakes, Smoothies…
  • Gorgeous Purple Dutch Oven… My Ideal Soup Pan!
  • As Simple as it Gets Japanese Broth Soup (The Possibilities are Endless)
  • Healthy and Delicious New Favorite Snack

Gluten-Free Recipes

Wedge Salad with Roasted Tomatoes, Bacon, Chia Seeds, Sauteed Onions, and Ranch Dressing

Wedge Salad, Starring Roasted Tomatoes

CauliPower Linguine Pasta with Meat Sauce

Caulipower: Quite Possibly THE Best Gluten-Free Pasta

A Wonderful Gluten-Free and Vegetarian Cookbook: Whole Bowls by Allison Day

Gluten-Free Lasagna with Explore Cuisine Green Lentil Lasagna Noodles

Easy Gluten-Free Lasagna with Explore Cuisine Green Lentil (No Boil!) Noodles

Tostadas with Refried Beans and Tomatoes

Fast & Easy Summer Meal: Meatless Tostadas

Gluten-Free White Chocolate and Pecan Cookies

Gluten Free Cranberry Pecan Cookies

Air Fryer and Rotisserie in One!

Instant Vortex Plus 10 Quart Air Fryer, Rotisserie and Convection Oven (Amazon link)

A Reminder for all Cooks…

Kitchen Accident Tracker

If my accident can prevent you, a pet, or a child from being hurt, it will have been worth it to me… read more here!

Footer

T-fal… As Good as Good Gets

The T-Fal Cookware Set (Amazon link), above, is absolutely one of the best cooking sets you’ll ever find. It’s on Amazon and available in several gorgeous colors.

Subscribe to Get Cooking

Fill in the form below to receive updates through e-mail whenever something new has been added to the food blog.


Powered by FeedBlitz

  • Email
  • Instagram
  • Twitter

Contact me through e-mail at joitsigers@gmail.com and/or connect with me through social media (see above). ~ Joi (“Joy”)

I do not claim to have taken all of the photographs on this website. I did not take any of the “product” or “affiliate” merchandise photos, nor do I claim to own them. If you are a photographer that sees something you want removed, simply e-mail me!

Copyright © 2022 Get Cooking Food Blog   xml sitemap   Privacy Policy   Crazy Tea Chick!